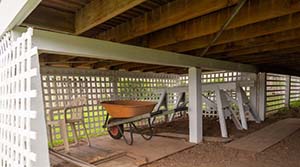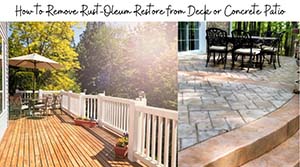
Is your old patio damaged beyond repair? You can bypass the mess and cost of tearing it out by building a deck over it.
It has become widespread for homeowners to replace old concrete patios with something easier to maintain and more attractive, like a composite deck. However, building one may not be as easy as it sounds.
When building decking over your concrete patio, you should check the local building office for code requirements. Have a detailed plan on how your deck will look like to have a specific budget. Ensure that you have all the materials ready and set a timeframe for when the project finishes.
Here, we look at the helpful tips for installing a deck over your concrete patio.
Can You Glue Decking to Concrete?
You can glue your decking to concrete. In most cases, construction projects use concrete and wood together with epoxy for attaching the wood decking to the concrete permanently.
The project could be something significant, like building a new deck or something small like making a dog house. However, concrete isn’t easy to work with like other materials because it’s dense, heavy, and solid.
Apart from using glue to screws or nails, there are different ways of attaching the deck to concrete to make it durable.
Attaching Wood Deck to Concrete Using Epoxy
Epoxy glue is among the most reliable approaches to securing wood decks to concrete. Several epoxy products have a specific design for wood-to-concrete applications. You can either use epoxy alone or together with screws and nails.
Before you glue your epoxy to concrete, you should first clean and dry the concrete and deck surface for them to bond effectively. Ensure you remove dirt, dust, and grease from the concrete and deck surface.
Using the Epoxy
You’re ready to start after cleaning and preparing the concrete and deck surfaces. It would be best if you also learned how to use epoxy. Ensure you check the product instructions to understand the recommended dry times.
Additionally, ensure that you adhere to safety instructions. Depending on the type of epoxy in question, you might need to wear a mask, goggles, and gloves.
Set the wood deck and concrete on a flat surface and apply your epoxy. Press the concrete and deck surfaces together and wipe any excess epoxy using a clean cloth. If excess epoxy hardens, chip it off using a putty knife.
The curing time for epoxy is up to 72 hours. However, you should check the manufacturer’s instructions for the exact period.
How Can I Cover My Concrete Patio?
Even though concrete patios are practical and durable, it doesn’t mean that they have to appear dull.
There are different ways, from paint to pavers, that you can employ to cover your patio to spruce up its look. The approach you select to protect your concrete patio depends on the deck’s condition and your taste.
1. Resurface the Concrete Patio
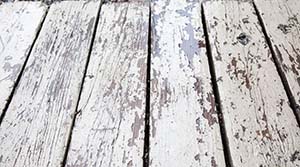
Your concrete patio may be worn and aged, which may be the issue at hand. When concrete patios age, they typically crack, chip, and flake.
If such challenges face your concrete patio, resurfacing it is the fastest and easiest solution. You’ll start by power washing your deck to remove any stains, chips, or flakes.
When the patio surface is clean, mix a crack filler and concrete patch with water to create a spreadable consistency. Some products are available ready to use without the need to mix anything.
It would help if you used a trowel to spread the repair compound over any chips or cracks on your patio and allow it to dry. If you like, you can sweep over the drying concrete patio with a broom to form a non-slip texture.
Concrete resurfacing materials usually cure faster, and you can walk on the new surface eight hours after application.
2. Stamped Concrete Overlay
Many people opt to stamp concrete patios to acquire the appearance of bricks and stone. The material you use for camping should be thicker, and the overlay needs to be ¼ to ¾-inch thick based on the stamp you’re using.
After you have smoothed the overlay, work quickly to stamp your concrete. Understand that you have a limited time to stamp your concrete before it starts to set.
If you don’t understand the stamping process, you can hire a professional to help you with the concrete patio improvement.
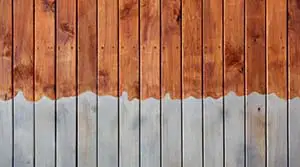
3. Stains & Paints
Applying paint and stains can significantly improve the appearance of your concrete patio. It’s a DIY approach that allows you to get as creative as you like.
Power wash it and let it dry before you start working for those wanting to stain or paint your concrete patio. You can then select an outdoor paint or concrete stain in a color of your choosing and apply it using a roller.
A stain might require more than one coat. After the stain or paint has dried, you can apply a concrete sealer.
4. Applying Pavers
One of the many ways to cover your concrete patio is by giving it a complete makeover and applying pavers over it. Before installing the pavers, ensure there’s enough space between the bottom of your door and the patio. In doing so, it avoids interfering with closing and opening the door.
However, we recommend that you use pavers only when you want to improve the appearance of your concrete patio. Pavers aren’t effective when the concrete pavers have serious cracks. In such a situation, you can go for a rug or stain.
To install pavers successfully, start by laying an outline around the patio edge. Use glue to attach your outside pavers to the patio.
We recommend that you lay your pavers in your preferred design.
5. Laying Tiles Over Your Patio
Another critical method of covering your concrete is laying tiles. Suppose you settle on tiles, select ones that suit the outdoor application. Ensure that you pay close attention to your tile’s COF (coefficient of friction).
The COF tells you how slippery the tiles will be when wet. The coefficient rates on a scale of 1 to 10. Here, one is slick, while 10 provides the most grip. Outdoor spaces require a COF of at least 7.
Tiles also require your base to be smooth and flat. Before installing tiles, wash your patio with warm water, trisodium phosphate, and a scrub brush. Apply an adhesive on the concrete patio, and then lay your tiles.
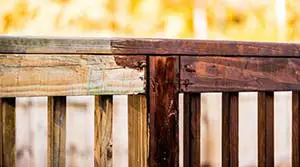
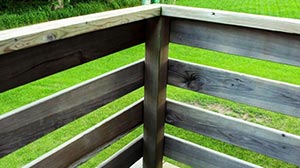
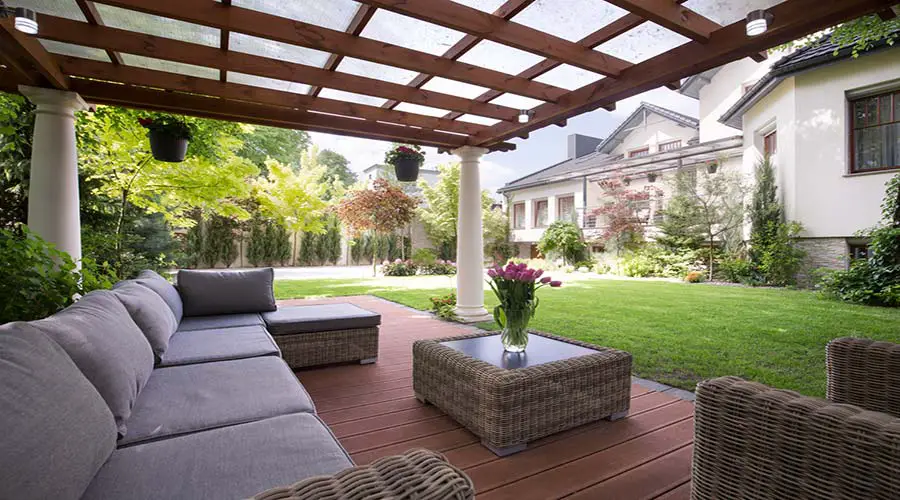
6. Installing Wood Deck
Wood decks offer the most efficient approach of covering a concrete patio. However, before installing a deck over your concrete, you should consider maintenance. While a concrete patio requires no care, wood decks require periodic maintenance.
Covering your patio with a wooden deck converts your low-maintenance patio into higher maintenance but top-quality deck. However, decking requires enough space between the patio door and deck.
7. Buying a Rug
Even though buying a rug offers a simple solution, it isn’t a meaty DIY project. Many decor stores are selling outdoor rugs.
The straightforward way to cover your concrete patio is to cover it using an outdoor carpet. You can then invest in outdoor pillows and seating to develop a posh living space.
The advantage of going for this approach is that you can change your mind later. There is also an option of spicing up your patio with lanterns, planters, and outdoor accessories.
An outdoor rug offers a temporary approach to sprucing things up while you wait for the budget and time to cover the patio with a permanent solution.
How Do You Build a Deck Over a Concrete Patio?
Building a deck is a simple process if you understand the steps involved. However, a professional might take less time to complete the task.
Let’s look at how you can build your deck successfully over a concrete patio:
Tools Required
- Level
- Miter saw
- Circular saw
- Hammer drill
- Drill/driver – cordless
Materials Required
- Decking
- Flashing tape
- Plastic shims
- ½-inch thick PVC trim
- Treated 2x4s
- Self-leveling compound
- 3/16 x 3 1/4 -inch concrete screws
Will a Deck Work on Your Patio?
Regardless of the situation of your concrete patio, you can still deck over it. Craters, seasonal movement, and cracks don’t pose any problems. However, you should be aware of the situations below:
- If your patio is badly cracked and sinks year after year, any deck you lay over it will also sink. Sometimes, settling concrete can stop the sinking.
- Laying deck over a concrete patio raises the patio level by 2-½ to 3-½-inches. You should therefore take note of door thresholds that adjoin the patio. If you don’t do this, the project won’t work for you.
- Stairs linked to your concrete patio can complicate the project. Ensure you raise your threads with the same distance as you raise the threads to keep step heights equal.
1. Time & Cost of Building a Patio Deck
You take about a weekend or two to cover a concrete patio with decking. However, you might encounter the unevenness of the deck, which might take you more time to balance.
The actual cost of installing a deck depends on the decking you select. Patios range from $1.5 per square foot for wood to about $10 per square foot for top-quality manufactured products.
Apart from the cost of buying materials, expect to spend on purchasing tools for a DIY project. There is also a cost involved if you decide to hire a professional.
2. Consider the Layout
The deck sleeper layout depends on the structure of the decking. If you decide to go for a standard decking design, you need rows of parallel sleepers. For complex decking patterns, go for a double sleeper to support boards that run perpendicular to others.
3. Solve the Water Problems
Ensure you self-level your patio to prevent water from settling in the basement. Self-leveling usually hardens fast to enable you to continue with other projects.
However, you should note that self-leveling is expensive. You can acquire the same results at a reduced cost using a concrete topping mix if not in a hurry.
You can also caulk the gap between your patio and the house to prevent water from seeping along the foundation.
Tips for Working With Sleepers
Even though screwing down sleepers using concrete screws is straightforward, there are things always to remember:
- Ensure that the screws penetrate your concrete patio by at least 1-inch. In this situation, 3-¼-inch screws are perfect.
- Dust compresses around your drill bit as you drill. It’ll slow you down, overheat the bit, and strain the drill.
- Drill your holes about ¼ to ½-inches deeper than where you expect the screw to reach. Providing extra space offers space for grit and dust.
- Always have additional drill bits. When a drill bit wears out, it slows down the drilling.
Lay Your Sleepers & Pre-drill for Concrete Screws
Your sleepers can follow your patio slope and don’t have to be level. However, they must form a flat place. A flat plane will come automatically if the patio is in good shape. You’ll spend more time fussing your deck with shims if it has sunken areas and ridges.
To prevent such a scenario, lay a straight board across your patio in a few spots. Ensure you add shims to raise any low areas.
Drill through spacers, sleepers, and into your concrete using a hammer drill and drive concrete screws into it.
Screw Down & Flatten the Sleepers
Use a straightedge to check for flatness. Raise any low spots using shims. Skip spacer at high areas and stack up shims instead.
Why Use Spacers?
Below are reasons why you should use spacers:
- Spacers allow you to run sleepers parallel to your house so that the deck can run parallel to your house. With spacers, water can run under sleepers.
- Spacers allow you to apply longer deck screws.
- Spacers allow sleepers to dry out. Sleepers are kept off damp concrete.
Install Decking
Before you deck your concrete patio, cover sleepers using flashing tape since tapes prevent water from soaking the tops of the decking and sleepers, thus preventing the wood from drying.
At this point, proceed to install the decking.
Ways to Improve Your Patio
The decking process becomes simple if you select a simple decking design. A more straightforward plan translates into a cheaper and faster building process.
Whether your concrete patio is just bland or in bad shape, there are different ways of reviving it.
The crack factor: if there are cracks in your concrete patio, they’ll limit your options. It can attribute to cracks growing over time. Some might become uneven when one side of the rupture sinks.
1. Bury the Patio Under Pavers
Cover your patio with a thin layer of sand and lay the pavers over it. The cost of laying pavers ranges between $3 to $6. However, expect the whole process to take one to two weeks.
2. Hide the Patio Under a Rug
An outdoor area rug can add color to your patio and hide any damaged concrete. The carpets are available in different designs, prices, colors, and sizes.
3. Snap-Together Tiles
Interlocking plastic tiles snap together, and there is no need to fasten them to the concrete patio. There are less expensive options that are plastic only. Others have ceramic, stone, or wood.
Projects Involving Crack-Free Patio
If your concrete patio has no cracks, select from the below options:
1. Stain the Patio
A coat of stain and a coat of sealer transform your patio and constitute one of the least costly options. However, it would help to reseal the deck at least every 1-3 years.
2. Tile & Resurface
A concrete patio forms an excellent foundation for tiles. The cost of the tile depends on the type you select. A resurfacing can also make an old deck look new again.
Considerations Before Building a Deck
There is a lot of decision-making and planning to build and design a deck. For instance, you should consider the material, size of the deck, your budget, among other things.
Below are considerations to have in mind before building your deck:
1. The Purpose & Function of the Deck
It means determining how you wish to use your patio. Understanding the function and purpose of the deck enables you to design it easily. Below are some roles that the deck could serve:
- For outdoor privacy
- For entertaining
- As a spa or pool, surround
- For outdoor dining
- As a location for container gardening near the house
2. The Location of the Deck
After determining the deck’s function, it’ll be easier to decide where it should go. Here, you can think about scaling the deck to your property’s size.
3. The Budget
Your budget determines the design, materials, and size of the deck. If you want the deck to be designed by a professional, add the labor and permits.
4. Understand Deck Materials
Wood isn’t the only decking material that you can use. You can use plastic, metal, or wood for your decking purpose.
5. The Deck’s Style
Your house determines your deck style, as a good deck design should compliment your home.
6. Deck Lighting
There are various deck lighting ideas to consider. Lighting will provide a romantic and festive ambiance while adding safety to your deck.
Some lights to consider include:
- Overhead lights
- Path lights
- Landscape spotlights
7. Consider Built-Ins
You might consider adding more functionality. Build-ins offer your deck a customized and rich look. Consider build-ins that are within your budget.
8. Consider the Building Codes
Before building a deck over your patio, ensure you understand the legal procedures and building codes. In most cases, your design must be approved by the relevant authorities. The deck might also be required to be installed by a professional.
Conclusion
Most homeowners are now replacing their old concrete patios with something easier to maintain and more attractive such as decks. However, building decks require compliance with any available legal procedure and building codes.
Before you build a deck, ensure that you do a lot of decision-making and planning. You should, for instance, consider the material, size of the deck, and your budget, among other things.
If you can’t build a deck by yourself, approach a reputable professional to help you through the process.
Sources
- How to Use Epoxy to Secure Wood to Concrete
- Cover-Ups for a Concrete Patio: A DIY Homeowner’s Guide
- How to Build a Deck Over a Concrete Patio
- 10 Things to Consider When Building a Deck