Do you want to build a concrete patio in your home but aren’t sure of the exact costs? Usually, the actual cost will depend on your cement patio size.
The average cost to develop a concrete patio is about $2,433. However, homeowners can spend between $1,212 to $4,318 for quality installations. The labor costs for installation can vary between $3 to $10 per square foot. Concrete patio materials might cost $2 per square foot.
In this guide, we break down the cost of building a concrete patio.
How Much Is The Cost To Build Concrete Patio?
The cost of building a concrete patio varies depending on several factors. For instance, the price will vary depending on the size of your deck.
Let’s look at the cost of building a concrete patio with everything in mind:
Concrete Patio Installation Costs
Generally expect to pay at least an average of $5 per square to install a concrete patio, which doesn’t include the finishes, designs, and curves.
Your concrete patio size will determine the installation of your project. Some homeowners select size over design, and others prioritize pattern over dimension.
If you make additions such as stamping and color treatment, expect the costs to be high. However, going for a straightforward design means a lower price.
Patio Cost Per Square Foot
An entry-level concrete patio costs an average of about $5 per square foot. However, a more elaborate deck that has been designed, given color treatment, and stamped can cost up to $18 per square foot.
Concrete is among the most durable and efficient materials that you can employ on your patio. It’s especially perfect for warm climates since it doesn’t absorb much heat. It can also stay for at least fifty years without the need to be resealed or resurfaced.
The advantage is that you can install them by hand and do away with the cost of pouring concrete.
Concrete Patio vs. Pavers
Concrete pavers can cost between $5 to $10 per square foot. The installation of pavers is manually intensive, translating into about 50% of the project cost in labor costs. Even though both pavers and concrete require a suitable sub-base, pavers can drift apart if you don’t employ the correct impaction procedures.
Although concrete pavers cost more initially, they can last for between 25 to 50 years. However, it poses the risk of cracking. Replacement of a concrete paver is cheaper than repair. You’ll only have to replace the cracked pavers.
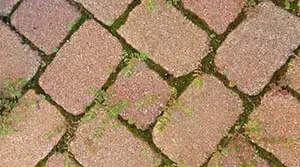
Concrete Patio vs. Brick
Brick patio materials cost about $7 per square foot. There is an extra $10 to $12 per square foot for installation because they’ll need to install the brick patio by hand.
However, brick patios can last for over 100 years.
Bricks offer an excellent alternative to concrete patios since they come in a variety of colors. You can also get creative in their designs. They are likely to break, shift, and break. You should therefore reseal and power-wash their surface at least once per year.
Concrete Patio vs. Wood Deck
Decks are more expensive to build than concrete patios. The average cost of building a wood decking is $25 per square foot. Most homeowners usually spend between $4,380 to $10,080 to complete the task.
An entry-level deck will cost you about $15 per square foot. A deck built with premium materials will cost about $35 per square foot.
With decks, however, you won’t worry about dealing with molds. The deck’s wood will fade if you don’t treat it.
Remember to stain, reseal, and power wash wood decks at least once every year.
How Much Does a 10×20 Concrete Patio Cost?
As we have seen above, the cost of an average concrete patio varies between $3 to $10 per square foot. However, it can go beyond $10, depending on several factors.
Based on the estimates, a 10 x 20 concrete patio will cost between $800 to $2,400, including both labor and materials.
How Much Does a 20×20 Concrete Patio Cost?
A 20 x 20 concrete patio will cost between $1,900 to $6,800 including materials and labor. Essentially the larger the concrete patio, the more materials you’ll need and the higher the labor costs.
If you want to get the exact costs of your concrete patio, you should ask for a quotation from a competent professional.
Concrete Patio Costs Based On Design
Apart from the size of the concrete patio, the design of the concrete also determines its cost. Expect a higher price if you expect your concrete patio to have a complicated paving pattern or lots of curves.
Let’s consider potential finish options that you can use on your concrete patio:
1. Stained Concrete Patio
A stained concrete patio having a single stain color will cost between $2 to $4 per square foot. The cost will increase with a rise in detail and complexity.
A stained concrete patio is the most reputable permanent color treatment for concrete patio surfaces. The stains are colorfast, naturally variegated, and come with a high-end appearance.
2. Colored Concrete Patio
If you wish to change your concrete patio color, it’ll cost you between $30 to $53 per Cu.Yd. The cost will be more if you want a separate mixer to be delivered & cleaned for every color.
A colored concrete patio produces a surface that offers a range of rusty patina and rich tones. The concrete won’t fade if you treat it with an acid stain. Ensure that you power wash it regularly to get a durable patio.
3. Polished Concrete Patio
A polished concrete patio will cost you between $3 to $8 per square foot. However, the cost depends on complexity, sheen, and size.
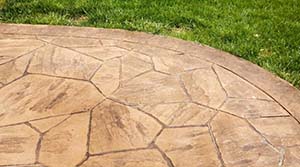
4. Stamped Concrete Patio
A stamped concrete patio might cost you between $1.5 to $1.7 or more per square foot.
A stamped concrete patio offers the best quality in terms of uniqueness, colors, and versatility. Apart from blending color while mixing the concrete, you can add another color during the cement placement.
Always go for a contract with reputable experience in stamping. To make it durable, ensure that reseal or power wash at least once per year.
5. Painted Concrete Patio
It’ll cost you between $2 to $6 per square foot to either coat or paint your concrete patio. Adding color and design to your concrete patio is an excellent approach with professional quality products.
After painting, ensure that you do regular cleaning and resealing to ensure durability.
6. Broom Finished Patio Cost
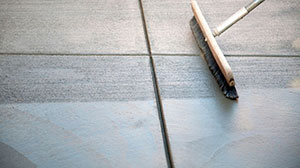
A broom finish is a concrete patio that gets broomed before being allowed to dry. It’s a cheap and easy way of adding a decorative edge that’s slip-resistant. The cost of this is between $0.4 to $1 per square foot.
This type of design is affordable and fast to complete. To ensure that it’s durable, you should pressure wash it.
7. Decorative Stencil Masking
Your installer can also employ concrete stencils. Stencils cost between $1 to $10 per square foot based on the intricacies of your design.
The design will allow you to apply both colors and layering to deliver an old-world craftsman’s look. It’s the perfect design for you if you’re after a unique look for your patio. Ensure that you reseal and pressure wash after each year.
8. Engraved Concrete Patio
Scoring will cost you between $1 to $2 per foot.
If you’re after a decorative concrete patio that feels and looks like flagstone but at half the price, go for this engraved patio. This design produces a realistic brick design or paving to score decorative patterns.
You can apply the engrave texture on your existing concrete whether you have aggregate or textured concrete patio types.
9. Aggregate Concrete Patio
An aggregate concrete patio costs $0.9 to $1.8 per square foot and offers a surface of small pebbles and stones. Therefore, the deck is more durable compared to concrete alone.
Your choice of aggregate or pebbles incorporated into the mix creates a variety of different styles and improves durability, ensuring that your patio lasts for a long time.
Concrete Patio Ideas
Below are some of the concrete patio ideas to implement:
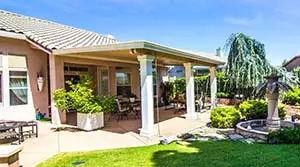
Living Room Patio
- The average living room patio size is 16′ x 18′.
- It mirrors the functionality of your living room.
- It features more comfortable lounge chairs, an outdoor sofa, and a coffee table.
- The addition of a pergola is also a common feature.
- You can also include lighting, a fireplace, and possibly water features such as fountains or waterfalls.
Outdoor Dining Patio
- It provides enough room to pull out chairs and walk around the table.
- They feature an average size of 12′ x 14′.
- It can incorporate 6-8 people around a table having a diameter of 48″.
Sundeck Patio
- Available in average sizes of 5′ x9′.
- The design offers enough space for a 3′ space around the chairs, a few lounge chairs, and a small room for a small cocktail table.
- It can be used to create a nice resting spot near your outdoor pool.
Bistro Patio
- This is the smallest patio and is available in sizes of 5′ x 7′.
- The design will offer room for a few chairs and a small table.
- In the winter and autumn months, swap the table for a firepit.
Concrete Patio Installation Process
Since we have already seen the cement patio installation costs, let’s now consider what the installation process entails:
Step 1: Set-Up Guide Strings
Use mason’s lines and stakes to set up guide strings to represent your patio’s edges. You can start by driving 2-stakes at every corner of your patio area. Ties your mason’s lines between the pairs of opposite stakes to create a rectangular or square layout.
Where the stakes will intersect will be the patio corners. Ensure strings are at least six inches above the ground.
Step 2: Secure Your String Layout
Check your string layout to see whether it’s a square by measuring diagonally between opposite corners. If the diagonal measurements are equal, then your layout is a square. If they aren’t identical, you should adjust stake positions until the measurements match.
Step 3: Slope the Strings
You need to slope the strings for the patio to slope from your house at ⅛-inch per foot. For instance, if the distance of the deck from one end to another is 8 feet, it should slope by 1-inch downwards.
Step 4: Excavate the Patio Area
At this point, you need to remove any vegetation in your patio area. It would be best if you extended the edges almost 6-inches beyond the patio sides.
Excavate soil to the depth of about 8-inches. Even as you work, keep measuring from your layout lines to determine the excavation depth. Rent a plate contractor to tamp the soil well.
Step 5: Install the Gravel Base
Fill the area you excavated with 2-inch of compactible gravel. Rake your gravel smooth and compact it with the plate compactor.
You can then add about 2-inch of gravel. Again compact this second layer of gravel.
Step 6: Construct the Concrete Form
At this point, build a concrete form with 3½-inch screws and 2 x 4 lumber. The form’s interior dimensions should be equal to the concrete slab’s final dimensions.
Set the form on the gravel base and measure the diagonals to ensure they form a square.
Step 7: Secure the Form
Drive wood stakes around your outside form, spacing them 2-feet apart. Ensure that the stakes extend about 3½-inches above the ground.
Lift the form to ensure that the top surface is four inches over the ground. You should then secure the form to the stakes. Ensure that you maintain even spacing between the guide strings and the structure.
After securing the forms at all the stakes, remove the stakes and guide strings.
Step 8: Pour the Concrete
You should coat the form’s interior surface with vegetable oil to prevent concrete from sticking to them. Follow the manufacturer’s direction or the building code to mix fiber-reinforced concrete. Transfer a thoroughly mixed concrete and dump it in the form.
Distribute your concrete well using a shovel. Repeat the process until you fill the form to the top.
Step 9: Spread the Concrete
Use a long 2 x 4 board and screed the top of your concrete. Use a shovel to either add concrete or remove the excess concrete for the top of your concrete to be level and flat.
Step 10: Finish the Concrete
Allow your concrete to cure until the moisture on the surface (bleed water) disappears. After it has disappeared, smooth your exterior with a darby.
Use an edger tool to round over your slab’s edges. You can also use a wood float to smooth out blemishes on the surface.
Step 11: Include a Broom Finish
However, adding a broom finish is optional. If you would like to add a slip-resistance, broom the surface of your concrete.
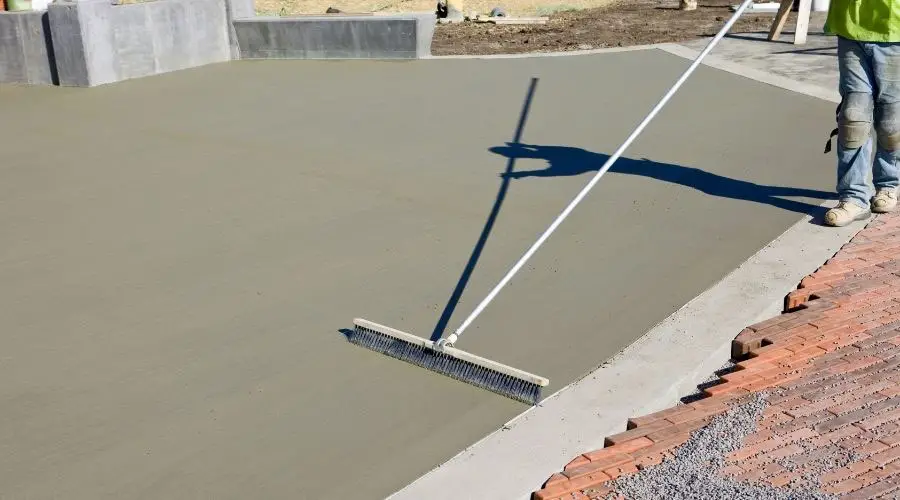
Here, you need to drag a broom across your concrete patio surface in parallel and straight lines. After you have broomed the whole slab, smooth the control joints and edges again.
Step 12: Cure & Cover the Patio Slab
Use plastic sheeting to cover your concrete patio slab. Cure the concrete by keeping it moist. Ensure that you mist it with water at least every day. Repeat the process for 1-2 weeks.
Step 13: Complete the Task
It is now time to remove plastic from your concrete. Remove the stakes from the surface by disassembling the wood form.
Ensure you backfill around your slab using soil or any other material. If possible, you can seal your concrete patio using a reputable sealant.
Conclusion
As we have highlighted above, it’ll cost you about $2,433 to develop a concrete patio. However, the cost varies between $1,212 to $4,318.
You also need to factor in the installation costs, which vary between $3 to $10 per square foot. There are also other additional costs such as warranty, permit, materials, and patio site access.
You can select from the several concrete patio design ideas that we have recommended above. If you don’t have enough experience to install the patio, call a professional to help you.
Sources
