There is much more to building a concrete patio than pouring the slab and constructing other relevant features. The ground preparation and leveling can be quite a hassle.
It takes a lot of thought to prepare the ground and make it ready for a concrete patio. Below are some things you need to tackle:
- Set up a budget
- Get professional help if you need it
- Determine how to construct the patio
- Keep up with building codes
- Know where the utility lines are
- Cater for drainage
- Consider the soil stability
- Take accurate measurements
- Pour the concrete patio base
It helps to divide the patio construction work into manageable phases, so it is not overwhelming.
This article will look into different issues you may encounter when preparing and leveling the ground for a concrete patio.
I will also provide proven tips I have learned as a home inspector, which you can implement to deal with these issues.
How Do I Level The Ground For A Concrete Patio?
Leveling a concrete patio means making sure the ground does not have any uneven surfaces so that you can smoothly pour the slab.
Here is a step-by-step guide I created to help you construct a beautiful concrete patio:
1. Set Up A Budget
It makes no sense to construct a patio blindly without knowing how much it will cost you. For that reason, you need to set up a reasonable budget.
Generally, your patio construction budget will depend on various factors, such as:
- Location
- How much work you need to do
- The level of expertise required
- What kind of materials you will buy
- How complex it is to design and install your patio
- The condition of your existing property
On average, you should expect to spend anywhere from $1,212 and $4,318 to install a poured concreted patio professionally. However, the costs could be lower or higher, depending on the work needed.
The materials will cost you $1 to $2 per square foot, while the labor will cost you $3 to $10 per square foot. So, if you choose to do some of the work, you could save a significant chunk of money.
To ensure that you have enough money for your concrete patio project, it would help to set aside a larger budget than what estimates say you need. It is always better to err on the side of caution.
2. Get Expert Help If You Need It
If you have some construction skills, you could rope in some of your family and friends and make the concrete patio on your own. And when in doubt, you could always use online learning resources, such as YouTube.
However, if you do not know what to do, it would not hurt to get some expert help if you need it. Of course, it would cost you more, but you will be less likely to make mistakes.
If you have no idea what it would cost for contractors to install the patio, you could invite some of them to give you cost estimates. The general rule of thumb is to get at least three bids. These will provide you with a much more accurate picture of where the money will go.
It would help if you also asked for recommendations concerning contractors. You are more likely to get a reputable professional that way. But online resources, such as Yelp, BBB, Facebook, and Google business reviews, can help you decide whether to hire a patio builder or not. These tools will help you better understand whether a contractor is as reliable in reality as they portray themselves.
3. Determine How To Construct The Patio
Do you intend to construct the concrete patio from scratch or by repairing the existing one? The answer to that question will determine your approach when preparing and leveling the ground. What you do when building from scratch will be vastly different from what happens when you fix your existing patio.
a) Fixing Your Existing Patio
Fixing your existing patio is likely to be cheaper than building a concrete patio from scratch. But that depends on the condition of the existing surface.
It is worth noting that if the existing property has foundation problems, they will carry over when you pour the second layer of concrete. Such issues can arise as a result of tree root damage, frost heaves, and severe settling. So, you must fix these issues first before putting on the new layer of concrete. However, the solution depends on what the problem is.
Severe settling is a problem that occurs due to unstable soils and poor drainage issues. The patio built on such soils will sink into the ground farther than it was meant to, putting pressure into the slab, which will end up cracking or being uneven.
If you intend to reconstruct a patio with severe settling problems, you may need to fix it first. One way to do that is by mud jacking, which involves drilling holes into the patio slab and pumping slurry to elevate the recessed parts. The alternative is poly jacking, which consists of the injection of polyurethane foam to achieve similar results.
Once the slab is level, you can patch up the surface to prepare it for new concrete.
Frost heaves tend to occur in areas with snow. The phenomenon involves the soil swelling when freezing conditions are present, thus putting pressure on the foundation and patio slab and causing plenty of damage.
You must deal with this issue by constructing a patio foundation on the ground well insulated from frost. If an old patio is already in place, your choices may be limited to installing ground heating systems and improving drainage.
However, some existing patios are irredeemable. In such cases, you must remove them and start from scratch.
It would be best if you found a way to stop them from infringing your foundation and concrete patio where tree roots are concerned. Sometimes, that calls for cutting the entire tree. You may also opt to dig a trench around your existing patio annually then cut off the protruding roots. There is also the choice to use physical and chemical barriers to prevent the tree roots from expanding.
b) Building A Patio From Scratch
Building a patio from scratch makes sense if the existing slab is not repairable. It is also the only option for properties where a patio has never existed.
If that is the option you intend to go for, you need to do it right from the start.
4. Keep Up With The Building Codes
Each state and country usually has its building codes that dictate how to build. These regulations vary from one place to another due to the differences in geographical conditions. For that reason, you should try and read up on the codes in your area before constructing a concrete patio.
The International Residential Code (IRC) tends to act as a guide for most local regulators. So, it would help if you familiarized yourself with the basic guidelines.
For starters, you should inquire whether you need a permit. Generally, on-grade patios, 30 inches or less from the ground, do not need permits. However, you may require an excavation permit.
Another issue to consider is the exterior doors like the one that opens to your patio. According to the IRC Guidelines, such doors have a threshold height limited to 7.75 inches. On the other hand, if a patio door also acts as an egress door for evacuation purposes, it must be at least 32 inches wide and 78 inches high.
The IRC also sets rules concerning slabs, which you will need to pour for your patio. The general rule of thumb is that the thickness must be at least 3.5 inches or 89mm for any slab with direct ground support.
It is safe to assume that there are rules you do not know. So, it would help if you consulted your local authorities to ensure you do not break any of them. That is because there may be a zoning rule you are unaware of that could cause trouble for you if you do not observe it.
For example, in your locale, your patios could be restricted in size. There may also be restrictions on how far from the sidewalks or easements you can build. It is better to be safe than sorry.
5. Know Where The Utility Lines Are
Whether you intend to build a patio from scratch or repair the existing one, it pays to learn where the utility lines are. The last thing you want is to cut them off and interrupt the supply of water, gas, internet, or power. There is also the possibility of electrocution when such lines are cut.
And imagine what would happen if you end up cutting your sewer lines! That would be an awful experience for you and those in the vicinity of your home. Your neighbors may end up angry at you for a very long time.
Also, you could end up having to pay for the repairs, which could be pretty costly. So, instead of risking it, you can contact the relevant agencies to find out where all your utility lines are.
You can determine the utility lines’ positions by using the 8-1-1 number available for those wanting to dig their yards. There could also be the option of making an online request. Once you contact your local 811 state center, the agencies in question will send you a utility locator to mark all the underground utility lines.
Compare the marked lines with those you get from the 811 center. And ensure that all of them are accounted for. Typically, private utility lines may have to send their locator.
Once that process is complete, you can measure safety margins of 18 to 24 inches to ensure you do not accidentally cut any of them off when digging in readiness for your patio. Remember, utility lines’ locations may necessitate a change in your patio design.
6. Cater For Drainage
Drainage is one of the most significant issues as far as any construction project is concerned. It could be the reason why your old patio has severe settling issues due to unstable soils. And in snowy areas, improving drainage may enable you to solve frost heave problems.
Remember, your local building codes may dictate how to build your concrete patio so that there are no drainage issues. But the IRC provides basic guidelines too.
For example, IRC rules state that typical lots should be graded to drain water away from the foundation. And that grade should be six inches or more for the first 10 feet.
However, in a situation where that is impossible, you must construct a drain or swale to divert water away from the foundation. In addition, impervious surfaces within 10 feet of the building foundation, such as patios, must have a minimum slope grading of two percent.
You may also be required to use non-settling compact soils to improve drainage. Usually, gravel is the best option. And you must have a gravel layer that is at least three inches thick to accommodate a 4-inch thick patio concrete slab. But the thicker the gravel layer, the heavier the concrete load it can support.
Another rule you should consider regulates drainage pipes. These are common within gutter systems. But they are also helpful in transferring water from one place to another as part of footing drains.
Typically, regulations state that these filter-covered pipes must sit on a gravel bed of two or more inches and be covered by at least six inches of crushed rock or gravel. In addition, they must extend one foot or more from the edge of a footing perimeter surrounding concrete or masonry buildings with a basement.
So, when digging trenches for a patio, you need to factor in the drainage pipes if they do not exist or are damaged.
7. Consider The Soil Stability
Soil stability underneath the patio base determines how well it settles without sinking and forming cracks. Stable soils drain well and are compact.
You must have compacted soil to act as a subgrade layer. It will provide support for the gravel layer, which is meant to improve drainage.
Different soils can accommodate varying amounts of loads. So, you may need to hire a soil expert to test your soil to determine its load-bearing value (LBV). Then you can estimate how much live load they can accommodate once you pour concrete to form the patio. The goal is to ensure that the soils underneath the slab have a similar LBV throughout the patio area to prevent severe settling issues.
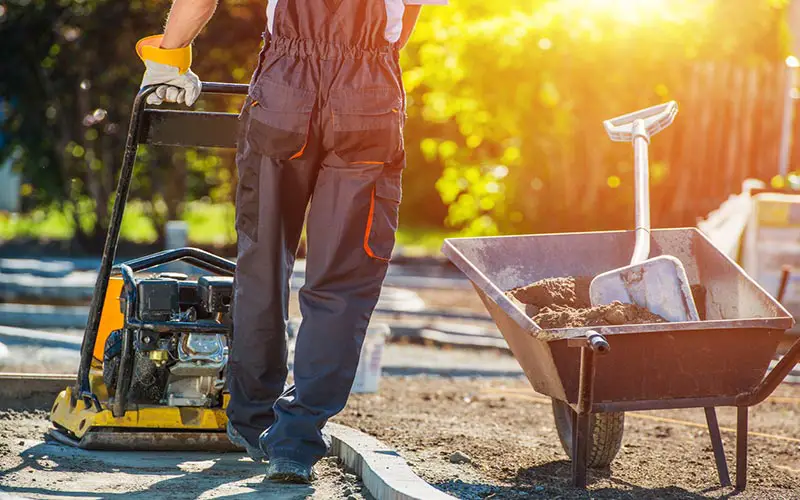
One way to compact soil is to use a plate compactor on moist soil. Do it in a row pattern, so you do not miss any spots.
But do bear in mind that you may have to dig a little bit, perhaps five inches or so, to get to the compact soil layer in some situations. Gravel or sand can replace the topsoil layer you remove.
For areas with a lot of clay, lime can come in handy in helping to stabilize the patio building site.
8. Take Accurate Measurements
Your slab will be only as good as your measurements, so take accurate ones. And remember to consider the position of your utility lines, building codes, and budget when determining the size of patio you would like to construct.
Do not bite more than you can chew because you would be forced to compromise on quality or dig deeper into your pockets to pay additional costs.
a) Taking Measurements
If you intend to pour more concrete over an existing concrete patio, you also need to take measurements. The length and width of the existing patio will serve as a guideline for the area you want to cover.
When building a patio from scratch, depending on the design, you can measure the length and width of the patio area and mark all the relevant points. To determine the slope, use a line level. Then drive the stakes into the ground to mark the patio’s perimeter and tie taut guide strings to show where the patio level should be.
b) Calculating Concrete Amount
To determine how much concrete you can use, take advantage of online concrete estimating tools. But you must already know the slab thickness, which can be based on the local building codes.
You will get the cubic volume once you multiply the patio area with the slab thickness (after you first convert it into feet). And you can convert that into yards, which would then help you determine how many bags of concrete you would need for your patio.
These calculations will also give you a better idea of whether your budget will be enough. There is always the option of adjusting all your measurements.
c) Factoring In the Slope And Grade
After marking the perimeter and doing the math, you can proceed to clear the area of vegetation. Then create a solid base for the patio. To do that, you may have to excavate the soil while factoring in the gradient your local building requires. So, while the area will be even from side to side, it will slope away from your home to improve drainage.
If you want a level patio, excavate up to eight inches. But for a raised version, only excavate four inches. Then add gravel in two phases and compact it until it forms a solid layer of at least three inches.
d) Setting The Concrete Shape
The concrete form is next. You can build it using lumber and screws to shape the concrete you pour on top of the gravel layer.
Secure the form with stakes to the outside to keep the form firm. And apply vegetable oil to these forms to prevent concrete from sticking.
You need the form even for old patios that need resurfacing. And if you opt for mud jacking or poly jacking, the professionals will be responsible for lifting the slab to the correct elevation.
9. Pour The Concrete Patio
Once the ground or slab is even, you need to ensure you take additional steps before pouring the concrete. You may need to patch an old patio up by cleaning it up, filling in the existing cracks, grinding raised areas, installing rebar, and applying a primer coat before resurfacing.
If you are resurfacing the old concrete patio, mix the concrete overlay according to the manufacturer’s instruction and spread it over the prepared surface.
On the other hand, if you are building a patio from scratch, you need to mix the concrete based on instructions and pour it onto the compacted soil. It helps to ask for help from your loved ones because concrete mixing is a labor-intensive process, and you must do everything in one day.
You can use a shovel to spread the concrete to all corners and a screed to ensure everything is level.
Any designs or expansion joints must be put in when the concrete is wet. Then you can let the patio base cure while under waterproofing cover.
Final Thoughts
Please do your research before pouring concrete for the patio. So much work goes into constructing the patio, and many rules apply. So, if you are not knowledgeable, you may make mistakes that cost you in the future.
References:
How Much Does A Concrete Patio Cost?
Polyjacking vs Mudjacking: What it is and which is the better concrete leveling method
Do You Need Gravel Under Concrete Patio, Slab, Footings?