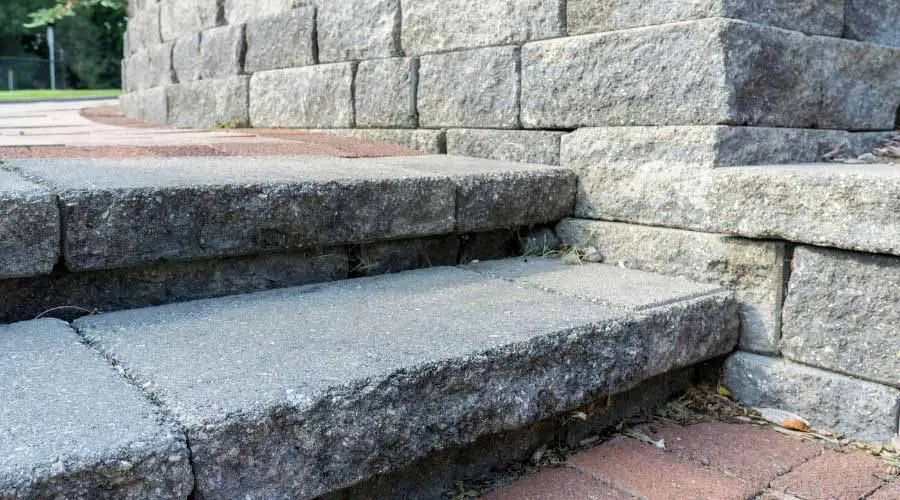
When you need a durable material for outdoor applications, pavers are an excellent option. Pavers are an affordable and stylish material used for walkways, patios, and other outdoor surfaces.
These masonry blocks can also be utilized to build patio steps with planning and some high-quality materials.
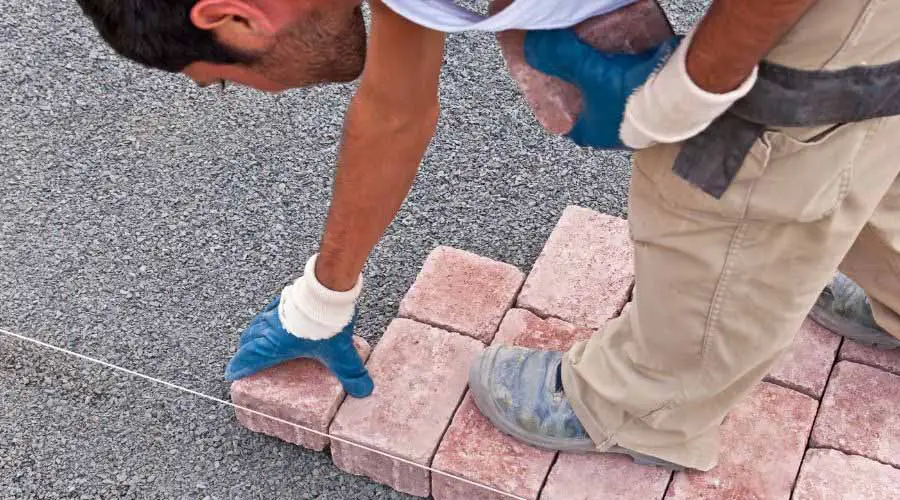
To build patio steps with pavers, you first need to level the area leading up to the patio and pack the soil. Set the base of the patio steps, using a mixture of gravel and sand to create a flat surface.
Lay your first layer of pavers, ensuring it’s packed tightly and perfectly level. Continue this process until the steps reach the patio entrance.
There are numerous planning steps to build the perfect set of patio steps with pavers. Keep reading to learn more about how you can create your very own set of patio steps that will last for years to come.
Can You Make Steps Out of Pavers?
Pavers are a highly customizable material used in an extensive range of different outdoor applications. You can choose from various sizes, materials, and colors that best fit your home’s style.
If you want to create a walkway made out of pavers that includes steps or a staircase, you are in luck.
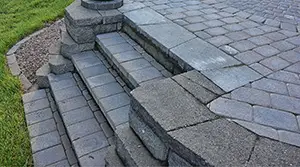
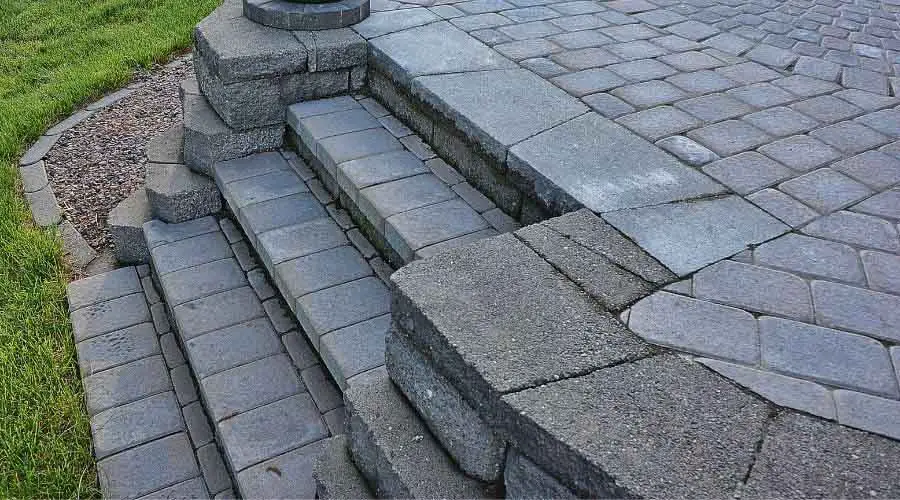
Homeowners use pavers for steps for staircases of all sizes. The uniform design of many pavers is laid side-by-side to meet whatever dimensions you would like for your patio’s steps.
The steps should be set at 7.75″ high and have 11″ tread to meet Residential Building Codes.
When building paver steps, you must understand the pavers will not be playing a significant role in the structure of these steps.
Using pavers for steps requires a strong base that combines paver sand and wall blocks. You will lay the pavers on top of the sturdy base for a stylish finish for your home’s steps.
Can You Create Half-Round Steps From Pavers?
If you want to add more style to your home, you can install a curved set of steps that lead up to your patio.
You can start by creating a symmetrical half-circle that will act as the starting steps of the patio. Laying the perfect set of curved steps requires extreme attention to detail and proper planning.
If you want to have curved patio steps, you can use the following paver materials:
- Brick
- Sand
- Concrete
- Natural stone
Due to the design of curved steps, you will need to set the pavers in cement to keep them from moving. One of the easiest ways to create the perfect half-circle is by building a concrete form that fits the dimensions of your patio.
You won’t need a concrete chute for this minor project and can use an old-fashioned shovel for the job.
Creating curved steps should be done by experienced builders only, as the process requires extensive amounts of measurements and cuts.
One wrong measurement and the symmetry of the steps will be affected, resulting in an imperfect design. If you are confident in your abilities, make the extra effort to verify your measurements are correct before making any cut.
How Do You Build a Paver Patio Step by Step?
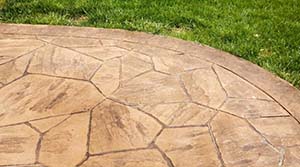
Paving slabs are similar to standard pavers but have more significant dimensions. Unlike standard pavers, patio paving slabs are natural stones in most cases.
The stone construction is easy to modify and cut to meet your project’s needs. Natural stone is also highly durable and will last for decades.
If you want to build steps with paving slabs, you must focus on proper planning. The technical side of building steps can be intimidating for many homeowners but will be accessible once you get the hang of it. In this section, we will be going over every aspect of building steps with paving slabs.
Every patio step construction project will involve the following four steps:
- You will map out the design of your patio steps and determine the rise and run of the steps.
- Remove all of the dirt and debris to level the surface before placing down the paving slabs.
- Make measurements and cuts to create symmetrical steps for your property.
- Lay the paving slabs down and glue them securely on the base blocks.
The longest step of the process is the planning phase of the project. You will need to ensure you have the correct tools, materials, and measurements before getting started.
Once everything is planned correctly, the rest of the patio step project should be straightforward and smooth.
Step 1: Planning & Buying Materials
Before we start building the steps, we need to buy the materials and tools for the job. If you are using paving slabs, you should find a suitable size for a set of steps for a patio area.
Paving slabs come in squares and will have uniform dimensions such as 12″x12″, 18″x18″, or 24″x24″.
If your patio already has pavers or stone as the flooring, you would want to find a color for your paving slabs and wall blocks that blends seamlessly.
You may also install new paving slab flooring for your patio area for a complete makeover. However, we will only be focusing on the steps leading to the patio in this tutorial.
To complete this project, you will need the following materials and tools:
- Shovel
- Spray paint
- Paver gravel
- Paving slabs
- Sand
- Wall blocks
- Rubber mallet
- Table saw
- Level
- Measuring tape
- Masonry adhesive
Step 2: Excavate the Area
Once you have all of the necessary materials for the job, you can now start clearing the area for your new patio steps. The excavation process will differ depending on your current patio area.
If you have existing steps leading up to your patio, you would need to eliminate them with tools like a chip-n-hammer or sledgehammer.
You want to level the area to dig a trench that is 6-inches deep and however wide you would like the steps to be for the patio.
I recommend you take the steps 35 to 40 inches wide for proper space. Measures that are too narrow can pose a safety hazard and increase the chances of falls.
Tip: To keep the trench in a straight line, use a can of outdoor marking spray to mark a visible outline that can be used as a guide while digging.
Add paver gravel into the ditch once the trench is dug out and compact it tightly with a mechanical plate compactor.
A light-duty mechanical compactor is enough for a project this size. The gravel should fill 4-inches of the trench and be packed until it is a solid foundation for the steps.
Step 3: Make Measurements & Lay First Risers
The general rule of thumb in the US is 7.75-inches of rise and 11-inches of run when making steps or a staircase.
However, the rules may need to be adjusted depending on your unique circumstance. Most patios can be reached within 3-4 steps, requiring an adjustment of the rise and run.
If your paving slabs are too large, you will need to cut them to meet the 11-inch run requirement. A masonry table saw is one of the easiest ways to make accurate cuts on paving slabs.
For those who haven’t operated a masonry table saw before, these are the safety rules you should always follow according to OSHA:
- Use respiratory protection.
- Cut masonry blocks in a well-ventilated area.
- Inspect the saw blade to ensure it’s in good condition.
- Use a dust collection system to reduce silica exposure.
You can cut the pieces of the paving slab to be 11-inches long. Additionally, you can cut the wall blocks you are using to meet the recommended 7.75-inch height.
While making the measurements, consider the added height you will have with the paving slabs. Most patio paving slabs will add 1 to 2 inches.
Once you have everything measured and cut, you can set the first risers of the steps down. Set them in the paver gravel and ensure they are level.
Check the height of the risers with a measuring tape from the ground to double-check your measurements. It’s easier to catch a mistake with your measurements early than notice it later, requiring you to restart.
Step 4: Lay the Paving Slabs
With your first row of wall blocks set, you can glue the paving slabs on the top of the risers with masonry adhesive.
Check if the paving slabs are lying level on the risers, and adjust them if necessary. You will continue to stack the blocks and add the paving slabs on top of the risers until you reach the patio door.
If you made the correct measurements, the steps should rise seamlessly with the start of your patio. The rise and run of the steps should also remain consistent with the steps.
You should continually check if the stones are lying level and tap them with a rubber mallet to adjust their position.
How Do You Make Steps Out of Landscape Blocks?
Landscape blocks or retaining wall units are easy to install masonry blocks that you can use to build various outdoor structures.
Whether it’s fireplaces or walls around the perimeter of your property, you can use landscape blocks.
If you want to create steps from landscape blocks, you can do the following steps:
- Installing base units and ensuring they are perfectly level.
- Add the landscape blocks and add gravel in the joints.
- Glue the top pavers to the top the landscape blocks.
- Repeat the process until it reaches the desired height.
Landscape blocks are very similar to standard masonry wall blocks and are highly customizable for all of your needs.
If you need to cut the block to reach your patio or other outdoor areas, you can use a masonry saw to make an accurate cut quickly. These blocks are helpful for outdoor staircases of any length.
Note: Landscape retaining wall blocks weigh an average of 53lbs per block. When moving heavy objects, use proper form and assistance to avoid injury.
Can You Make Paver Patio Steps Into a Hill?
It is possible to create a paver patio steps into a hill. To do that, you can follow this procedure:
- Set a starting point of your steps at the top of the hill and another end at the bottom. You can set these points using wooden stakes in the ground.
- Next, you will need to mark the dimensions of your steps and give yourself a visible outline for where you will dig out of the hillside for the efforts.
- At the bottom of the hill, dig out an 8-inch deep hole that is the height and width of your first row of pavers or a paving slab.
- Next, dump 4-inches of gravel into the hole and then 2-inches of wet cement on top. Put your first pavers over the hole and ensure that the surface is flush. This first step will act as the foundation of the steps.
- After you have laid down your tread, you will add the riser of the steps to the hill and press it up against the dirt. Once the riser is attached with cement, you can move on to the process of the other steps.
- Dig out 2-inches of dirt above your first step and add more gravel into the hole for the second step. Add the tread and riser, repeating the process until you reach the top of the hill.
Can You Build Patio Steps Over Existing Concrete?
You can place pavers directly over a concrete slab, and it’s usually the preferred way for many contractors.
Cover the concrete with a 1-inch layer of coarse sand used to prep the surface for the pavers. You can now start the standard patio step installation process.
The concrete slab should be in excellent condition if you want to use it as a base for your patio steps. Damaged concrete slabs can create the unstable ground, resulting in broken steps shortly.
If you want to know if your concrete slab is suitable to be used as a strong base for your patio steps, look for the following warning signs that it’s not:
- Cracks in concrete: One of the biggest signs that your concrete slab is not in good condition is if it has cracks. A crack in concrete means that it has lost its structural integrity.
- Pitting on surface: Pitting or spalling of concrete is typically found in colder climates when water gets trapped in the porous surface of concrete and expands once frozen in cold climates.
- Discoloration: If moisture finds its way into your home’s concrete slab, it will start to affect the color of the surface. When you notice dark spots, there’s a good chance your concrete slab is not in good condition.
- Presence of mold or mildew is a tell-tale sign that a surface has excess moisture and needs a replacement. It typically is black or green with a strong, musty odor accompanying it.
How Many Inches of Sand Do I Need for Pavers?
For paver installation, 1 inch of sand is recommended. Because one inch equals 1/12th of a foot, divide the surface area in square feet by 12 to calculate the number of cubic feet of sand needed.
Are Pavers Cheaper Than Poured Concrete for Patio Construction?
Standard concrete slabs will be the most cost-effective upfront option compared to concrete pavers. According to HomeAdvisor, concrete slabs are $6 per square foot, including labor costs.
Concrete pavers will be $8-$15 per square foot for installation or $3-$6 per square foot for material costs only. However, the long-term prices can vary as poured concrete requires more repairs than paver steps.
Concrete slabs have the disadvantage of being more prone to needing repairs than concrete pavers. Most modern concrete slabs will last between 10-50 years, depending on the environment and climate. Concrete pavers have been known to last upwards of 100 years, with minimal maintenance.
Conclusion
Few materials are as elegant and durable in outdoor settings as pavers. The price of pavers can also be very cost-effective if installed as a DIY project.
Building patio steps from pavers will improve the appearance of the space and give you a set of stairs that will last for decades without repair.
However, you must follow the proper steps to build the steps correctly. You need a strong base established and proper material alignment, whether using paving slabs, modular pavers, or landscape blocks. With those things in mind, you can now go out and build your very own patio steps.
Sources