A deck is an excellent addition to a home and can transform your yard into a private oasis. A deck must meet specific codes, including how it is attached to the house.
If the deck is not connected correctly, it can cause damage to the house and cause severe injury or death.
Properly attaching a deck to a house requires a ledger board, flashing, and the proper fasteners to make the deck safe and meet code. The wood on the home has to be in good shape before attaching a deck to it.
A ledger board is a piece of 2×8 material at the minimum that attaches the deck to the house. The recommended material for a ledger board is treated pine.
In this article, we will give you crucial tips on how you can make an attached deck with confidence.
How Do I Build a Small Deck Attached to my House?
Here are six guidelines to attach a deck to a house the correct way.
1. Determine the Height for the Ledger
If you know the height you want the finished deck to be, subtract the deck board thickness to get the proper size.
If you have a thick flashing material, you will also have to subtract that thickness. The deck height needs to be at least 1″ below the bottom of the door sill to prevent driving rain and snow from infiltrating the home.
2. Block the Floor Joists from the Inside
Blocking the floor joists is critical to creating a stable and secure connection for your new deck. Take exact measurements from the basement or crawl space and then cut the 2x blocking to fit. Screw the blocking on the top and bottom edges to secure them.
3. Install the Flashing Under the Siding
You might have to cut away the siding to fit the ledger board. After you cut away the siding, slide the flashing under the siding where the ledger board will fit up under it.
This must be a water-tight connection to keep the water from penetrating behind the ledger board. After the ledger is installed, you can do this step if you have room under the siding.
4. Attach the Ledger Board
Cut the board to length, then slide it up under the flashing. Secure it in place with lag bolts or lag screws spaced evenly in an alternating pattern of one up, one down.
The lags need to be spaced 2 inches from the ends and 2 inches from the top of the board. Pre-drill the holes to make this step more manageable and prevent splitting the board.
5. Set the Joists in Place
Layout the spacing requirements you will use for the deck joists on the ledger board, the most common is 16 inches on center. Use a square to mark a line on the ledger board put an X on the side of the joist.
6. Install Joist Hangers
Install joist hangers filling all the holes with approved galvanized nails or screws. Joist hangers strengthen the load-bearing connection.
Make sure to get the proper size hanger for your joist size. You can install the hangers before installing the joists.
How Do You Flash a Deck?
One of the most critical but often missed steps by most DIYers is the flashing of the ledger board. First, you would like to install a waterproof back flashing on the home at least 12 inches under the siding above the ledger board.
Next, install the ledger board to the house’s rim joist over the back flashing. A “Z” flashing cap is installed on top of the ledger board and under the siding and trim.
The last step is to seal it with an exterior calk or silicone sealer on any overlap that is not 4 inches or more and any inside corners.
You can purchase the Z flashing cap or bend to fit if you have an aluminum brake. Turning your own is preferable if you have a roll of coil stock on hand.
Are Decks Supposed to Be Attached to the House?
When building a deck, you have two choices: making it freestanding or not attached to the house, building it the traditional way, and connecting the deck to the house by ledger board and lags.
Either method will comply with building codes, and the home’s exterior cladding can decide if you build a freestanding or connected deck. If the exterior cladding is brick veneer or stone, making a freestanding deck would make it easier.
Can a Deck Be Attached to Brick Veneer?
Brick veneer is quick to install and will add a layer of protection from the weather, but it does not have actual brick stability or load-bearing properties.
There are specially-made connectors made for brick veneers like the Simpson Strong-Tie BVLZ brick veneer ledger kit.
This connector is designed to allow a ledger board to attach through a brick veneer without removing a section of it.
Do I Need to Cut Vinyl Siding Away to Install a Ledger Board?
Never connect a ledger board over siding, as it will weaken the connection, no matter what you hear. You can cut away vinyl and aluminum siding with tin snips very easily.
Alternatively, you can set a circular saw to a shallow depth and cut the siding this way, making sure not to cut the house sheathing below.
What Size Lag Bolts Do You Need to Attach a Deck to a House?
The 2009 IRC gives three options:
- 1/2 inch lag bolt
- 1/2 inch lag screw
- 1/2 inch bolt
These are all with the ledger spaced off the wall sheathing by 1/2 inch. The lag bolt needs to be long enough to penetrate the inside of the rim board of the house by 1/4 inch.
How Far Should I Space Lags on a Ledger Board?
Spacing the lag bolts is crucial for properly installing the ledger board. It boils down to the span of your joist and the style of lag you are using.
| Spacing Schedule for 1/2-Inch Lag Bolts: | Spacing Schedule for 1/2-Inch thru Lag Bolts: |
|---|---|
| 0-6 foot span 30 inches on center | 0-6 foot span 36 inches on center |
| 6-8 foot span 23 inches on center | 6-8 foot span 36 inches on center |
| 8-10 foot span 18 inches on center | 8-10 foot span 34 inches on center |
| 10-12 foot span 15 inches on center | 10-12 foot span 29 inches on center |
| 12-14 foot span 13 inches on center | 12-14 foot span 24 inches on center |
| 14-16 foot span 11 inches on center | 14-16 foot span 21 inches on center |
| 16-18 foot span 10 inches on center | 16-18 foot span 19 inches on center |
Can I Use any Lag Bolt to Attach a Ledger Board?
Due to legger boards being made of pressure-treated pine, which is a process that infuses chemicals into the wood. The chemicals used in the pressure-treating wood can accelerate corrosion on the lag bolts.
The lag bolts attached to a ledger board need to be either galvanized or stainless steel to prevent advanced corrosion.
Can a Ledger Board Extend Past a House?
If you extend the ledger board past the house, you must remove the siding corner and flash it correctly. Ledger boards are sometimes extended beyond the home, functioning as a beam to a suitable support post.
Is the Ledger Connection Method the Same if the Home’s Floor Joists are Nonstandard?
If your floor joists are framed with something different than solid wood, like a Wood I-joist, or a manufactured joist system, you will need to check and see if the rim board is structural or not.
To test the rim board for structural integrity, find an area that you can flash or cover later, and drill a 1-inch hole through the rim.
If the rim board is 1 inch or more significant of solid wood, it is considered structural, and it’s safe to connect the ledger board to it.
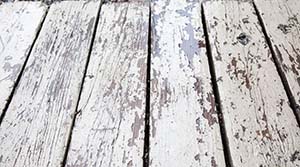
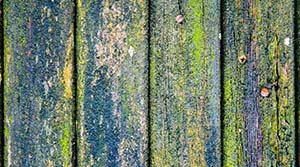
What Happens if a Ledger Board is Improperly Flashed?
If the flashing is omitted when building a deck, water will eventually get behind the ledger board and deteriorate the building’s sheathing behind it.
If left to rot, the stability and safety will be compromised, causing pull away from the house. Pulling out can end in disaster with injury or death if people are on the deck when it collapses.
Can I Attach a Ledger Board to a Concrete Wall?
You can attach a ledger board to a concrete wall. Pre-drill the hole pattern in the ledger board, and have two people hold the ledger board in place and mark all the holes on the concrete.
Using your hammer drill with a masonry bit, drill the holes you just marked. You will have to drill deep enough to install the expansion anchors.
Clear out the holes you just drilled and set the expansion anchors in the holes you just drilled. Install a bolt in each end to keep it secure while drilling in the remaining spots.
Tighten the bolts gradually, the wood flush against the concrete. Do not over tighten as this may cause the expansion anchor to become dislodged.
Do I Need Lateral Bracing to Install a Deck?
A deck ledger board is installed to resist shear forces preventing it from collapsing. It would help if you also braced a deck not to pull away from the house. Lateral bracing is not a code enforced in many areas, but it is still essential.
The 2012 IRC gives a solution where the deck joist is parallel to the house joists. This code requires two hold-down braces per deck.
The hold-down brace connects to the floor joist and the deck joist preventing the deck from pulling away from the house.
One example of a hold-down brace is the Simpson Strong-Tie DTTZMAX or USP DTB-TZ, and they are both rated at 1500 pounds.
Do I Need to Pull a Permit to Build a Deck?
Building a deck is a fun and relatively straightforward project, but you must follow codes. The first place to start is your local building code officials’ office, and see what type of permit you may need.
To begin with, it’s a good idea to check your township, then check with the city, and don’t forget about checking with the county for your local deck building codes.
It would be best to get a permit when building a deck or attaching any structure to your home as a general rule of thumb.
Getting a permit will inform you what you do and don’t need to build your deck safely. A safe deck makes for a happy family.
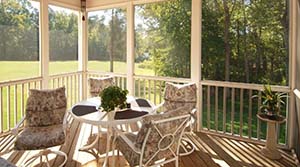
A deck is a great place to spend time with your loved ones, and no one wants to worry about it pulling away and collapsing.
When appropriately built following the advice in this article, you can spend time on your deck worry-free and enjoy the outdoors in your backyard.
Final Thoughts
Attaching a deck to a house can be a handful for some. However, this is crucial to building, especially without proper knowledge and experience. You must understand the process and what is needed for your deck.
It’s best to consult a professional for safety and address what you plan for your deck to make estimations accurately.
Sources