Flashing is reputable for offering a secret superpower that your deck requires to fight rot and water damage. You can install a deck flashing even after building your deck. Proper deck flashing enables you to have quality time in fresh air for a long time, so how do you install it on an existing deck?
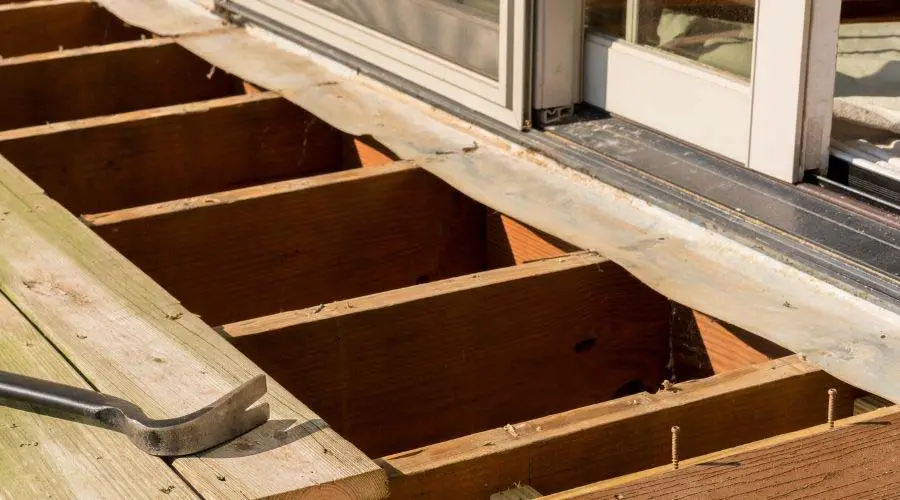
To add deck flashing, you’ll be required to get rid of the deck board or a section of deck boards pending if your deck board runs perpendicular or parallel to your deck ledger board. The deck ledger board links to your house.
Here, we consider adding flashing to an already built deck.
Is Flashing Required on a Deck?
Flashing is required where your exterior decks attach to the floor or wall assembly of wood frame construction.
The IRC code requires installing approved corrosion-resistant flashing material shingles to restrict water going into the wall. The flashing has to extend to the surface of your exterior wall finish.
Corrosion resistance is the ability of materials to withstand deterioration of their properties or surface when exposed to the environment.
Deck flashing, therefore, creates a barrier that restricts moisture from getting into your house through the opening you make while attaching the ledger board connection.
Flashing is critical even in concrete decks since corrosion can happen on the metal fasteners holding the deck together. The contact area between your house and patio is also prone to damage.
If you don’t take good care of the contact area, it can result in mildew or mold accumulating between the deck and your home.
Apart from the accumulation damaging the integrity of your deck, it also becomes expensive and time-consuming to fix.
There are various materials that you can employ for flashing purposes. Many companies commonly use aluminum since it is durable, relatively inexpensive, and easy to form. However, it’s likely to erode if aluminum gets into contact with fiber-cement siding.
You can also use lead-coated copper and copper, even though they’re harder to form than aluminum. However, copper is highly durable and is likely to last for an extended period.
PVC is another reputable material that people typically use, thanks to its durability and ease of working with.
Deck flashing is a critical aspect of deck safety and maintenance, and you must implement protection at all costs.
How Does Flashing Work on a Deck?
Deck flashing works by creating a barrier that prevents moisture from entering your house through the openings you created while attaching the ledger board connection.
You can purchase flashing on L- or Z-shaped 10-inch sheets or roll forms made from vinyl, copper, or stainless steel. For effective performance, avoid using aluminum or galvanized steel flashing with an ACQ pressure-treated wood ledger since it’ll rust.
From the available flashing options, vinyl flashing is the cheapest option. However, it won’t work effectively in areas having extreme temperature fluctuations.
If you decide to install copper flashing from a toll, ensure you apply copper nails to secure the flashing into place to eliminate corrosion. Copper functions effectively since it’s easy to bend and works well with chemicals involved in commonly sold ACQ-treated lumber.
Since flashing is available in various widths, ensure that the flashing you select is the perfect size to tuck up behind your house siding at least several inches. If there are any openings, we recommend installing a bead of silicone caulk.
How Do I Install Flashing?
Installing deck flashing can be a straightforward task, especially if you understand the whole process.
If you cut vinyl siding to install a deck ledger board, ensure that the moisture doesn’t touch wood where the home and deck meet.
In most cases, the first deck is slightly mounted away from the house and leaves a small gap where ice and water are trapped.
The trapped water and ice will, over time, cause the wood to rot. If you stay in a thaw/freeze cycle location, the protection becomes even more critical. The flashing restricts any water build-up and will contract, expand, and move your deck board over time.
Even though metal flashing such as aluminum flashing was mainly employed in the past, rolls of vinyl-back flashing and vinyl Z flashing offer better protection.
As we have mentioned earlier, adding flashing to an existing deck is a straightforward process and is something you can even do by yourself. You only need to follow the guidelines strictly and comply with the local codes and regional building laws.
Installation Process
However, if you don’t know how to add flashing, you can approach a professional to help you out. Below are the steps to follow while installing your flashing on the deck:
- Use a tin snip to cut a piece of flashing: Tin snips are the safest and fastest tools that you can employ to cut vinyl flashing. You can also opt to use self-adhering flashing if the local inspectors prefer it.
- Score using a utility knife: Avoid cutting all the way through. Clamp a straight edge on the surface to guarantee a straight line. It should just be a score and not a cut. If you cut halfway through, it’ll bend easily.
- Use a framing square and block to bend the flashing and get a 90-degree bend that fits inside the corner wall of your house—using a pencil and square, mark for cutting to length, and then proceed to cut using tin snips. Clamp a straight edge on the piece to make a bend at an inside corner. Ensure that you bend carefully.
- Take measurements carefully to cut around the door.
- Proceed to cut the flashing.
- Slip your flashing under the siding.
- Slip your siding up & around your door: Here, you need to slip your back flashing under the siding at least 3-inches at the sides and top. You might have to pry out your siding first.
- At this point, you can link the ledger board.
- Nail your Z flashing over the ledger: While nailing the vinyl Z flashing on your home, nail every 12-inch along with the home with roofing nails.
- Slip the flashing behind your trim: You can install flashing meant for ledgers. The flashing is supposed to be vinyl and must have a ‘Z’ shape wrapping around the top of your ledger.
- Overlap your flash in the corner: Slide the first piece at an inside corner for the bottom lip to slip between the two boards.
- Ensure you caulk the flashing: Squirt some silicone sealer or gutter caulk to seal joints that don’t overlap 4-inches or more. Here, you also need to caulk your ledger’s inner corner.
- Slip in the siding carefully: Here, you need to slip the bottom siding piece under the next-to-bottom piece. You might be forced to cut notches for obstacles and pull out nails to slip the piece far enough.
- Hold the siding at an appropriate height using a 1-¼-inch thick board.
You need to use an EPDM foam to prevent ice and water from building up between the flashing and the first deck board. A quality type of EPDM foam is Trex RainEscape Wall Flash.
If doing everything yourself sounds complicated, you need to contact a qualified deck builder to help you out.
Extra Waterproofing
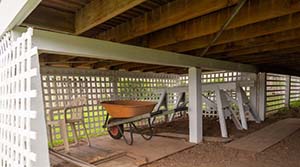
Apart from waterproofing between your deck and house, you should also ensure that you protect your substructure while installing a new deck. The substructure involves deck joists and beams that support the deck boards.
Select the beam tape and joists covering wood and shield it from any moisture effectively. For instance, Trex Protect is one reputable tape available on the market for such purposes.
Trex protect is a self-adhesive, non-skid deck flashing tape that shields beams, rim joists, top of the ledger board, and tops of posts from moisture that can cause wood decay and development of rot.
Benefits of Flashing tape
- It acts as a barrier between galvanized metal and wood.
- It prevents moisture penetration and helps seal deck fasteners.
- Flashing tape eliminates splitting from thaw and freeze.
- It offers a non-skid surface that provides safety during installation.
Protecting the deck, substructure, ledger board, and all wood during installation is critical in fighting water penetration. Even if you don’t see immediate results for investment in flashing, it’ll pay off for many years to come.
The Best Deck Flashing Metals
If you plan to add flashing to an existing deck, you should consider the different metals available for flashing purposes.
There are many metals available for deck flashing, and the option you require to use on your deck will depend on various variables.
Understanding the Metals Employed in Wood Decking
Nowadays, most treated wood makers are applying metal fragments to develop wood used for decks. The intention here is to enable the wood to resist rot and decay better.
For instance, manufacturers of treated deck lumber apply special heavy metal alloys that have undergone heating and conversion into liquid form and then used to treat wood.
The result is a stronger deck wood that is more resistant to different types of contaminants and diseases and less susceptible to insect and termite damage.
Copper is the most common metal employed in the development of deck lumber. For this reason, most reputable chemical wood treatment liquids don’t have large amounts of copper. It doesn’t rust easily and bonds well with wood.
Even though treatments might contain iron and tin, copper is still the metal ingredient of choice when treating deck lumber.
The Perfect Metal Flashing for The Deck
Since copper is typically is a metal ingredient in deck lumber treatment, it’s also a perfect option for metal flashing attached to your deck.
With copper, there’s rarely a chance of the metal reacting with the pressure-treated lumber or being incompatible with your deck lumber.
Older galvanized, or aluminum flashing types are the perfect option for decks developed out of standard lumber. However, we don’t recommend them for use with pressure-treated lumber that employs copper in the treatment process.
It is because galvanized or aluminum flashing reacts with copper in pressure-treated lumber, thus leading to faster rust and corrosion than it should.
If you employ pressure-treated lumber, we recommend that you go with copper. Even when your wood was treated with a different element apart from copper, the copper flashing functions well and doesn’t rust faster easily like galvanized and aluminum flashing.
Copper Flashing Rule Exceptions
As highlighted above, you can use galvanized or aluminum flashing without experiencing any problems if you’re using wood that wasn’t pressure-treated.
The older flashing types should work effectively if your wood uses different metal elements such as iron or tin.
Since galvanized tin or aluminum is less expensive than copper, employing cheaper flashing types for specific applications becomes more economical.
However, it would be best to make special orders from a lumber yard to get pressure-treated lumber that has not been treated with copper-based treating liquid.
The Cost of Deck Flashing
The actual cost of deck flashing depends on several factors. For instance, the price will be lower if you do the task yourself than hiring a competent handyperson.
The cost of flashing at the joist surface for one-layer protection varies between $80 to $150. It, however, depends on whether the task is done by a deck installer/carpenter or handyman.
The cost of replacing a 12 x 12 deck consisting of 144 square feet ranges between $720 and $1,440. Therefore, it’ll save you more money if you install deck flashing to protect your deck from damage.
If you want to save more during deck flashing, ensure that you do everything yourself. However, don’t hesitate to contact a professional if you feel like you don’t have the required skills for the job.
Conclusion
As we have seen above, adequate deck flashing allows you to have quality fresh air for an extended period. However, deck flashing isn’t an easy task, especially if you don’t have the required skills. There is, therefore, the need to involve a handyperson or deck installer.
However, if you want to add deck flashing, you’ll have to get rid of the deck board or a section of deck boards pending if your deck board runs perpendicular or parallel to your deck ledger board.
Remember that the IRC code requires you to install approved corrosion-resistant flashing material in a shingle fashion to restrict any water entering the deck.
Always take the relevant actions by adding flashing to protect your existing deck.
Sources