When building your deck, solid and sturdy footings can be the difference between having a reliable deck in ten years and having to start from scratch. Your footings are the first line of defense against harsh winds and unfortunate soil conditions.
That’s why it’s essential to know the steps that will allow you to build footings so that they will stand the test of time.
There are several ways to build your footers to have the best chance to stand against the pitfalls that could happen over the years.
Creating a firm foundation that is durable against heavy loads and crazy parties up top takes pre-planning, strong cement, and a lot of patience.
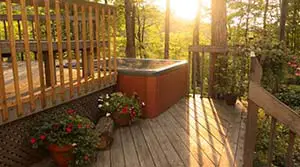
Before you can have that hot tub you want, make sure you have footers that can support that tub for years. You can do just that if you follow these easy steps.
1. Know the Code
There are two reasons why you must have a plan up to par with the code before you dig. The first reason is the surprising amount of underground conduits and cables beneath the surface.
- Be sure to contact your local locate company to locate these lines, so you don’t end up cutting off your TV channels.
- Another reason for proper planning is for the longevity of your deck. Having your footings up to code can prevent your deck from swaying and collapsing in extreme weather.
What is Code for Deck Footings?
When burying your footings, they must meet the following requirements to be up to code.
- Footings at least 12 inches below settle soil.
- Footings must reach below the frost line or have insulation.
- Must be capable of withstanding 1,500 PSI.
- Appropriate sizes according to beam and joist span.
The following table shows the appropriate beam span, joist span, and footing thickness.
| Beam Span (ft) | Joist Span (ft) | Footing Thickness (in) |
|---|---|---|
| 8 | <10 | 8 |
| <14 | 10 | |
| <18 | 11 | |
| 16 | <10 | 12 |
| <14 | 15 | |
| <18 | 18 |
2. Make a Plan
Now that you know how to set your footings and you’ve got your underground lines marked, you’re ready to dig. The type of footer you use will depend on what you plan to use your deck for.
It’ll also depend on how much work you’d like to do and the conditions in the area you live. That’s why it’s essential to plan for the entire life of your deck.
Some homeowners may want to do the minimum work for how they plan to use their deck. However, it doesn’t hurt to overbuild your footings in most cases.
Going for the most sturdy and load-bearing type of footings can save you a lot of trouble in the long run.
To help put things in perspective, here is a list of weight for items commonly on a deck.
- 4 seat hot tub: 551 lbs without water
- Inflatable pool: roughly 9,000 to 27,000 lbs
- Trampoline: 60 to 200 lbs
- Outdoor kitchen: 800+ lbs
- Motorcycle: 200 to 1,000 lbs
As you can see, the discussion of weight is not as simple as a number. Some factors can cause the heaviness of an object to change.
The size and amount of water in a pool or the brand of appliance used for an outdoor kitchen could make a difference of hundreds of pounds. That’s why knowing what you want and shooting past it in terms of load capacity is vital.
3. Choose Your Footings
The type of footings you can use for your deck vary, although some are better than others. Price and convenience have a direct relationship.
The more expensive your materials, the more labor you’ll typically have to do to install the footing.
So much so that at some point, it’s more worth it to pay someone else to do it for you. However, just because something is convenient doesn’t mean it’s the best thing for your deck 15 years in the future.
Poured Concrete Footings
Poured concrete footings are the most common type of support for your deck. These are some of the most reliable footings because of their resistance to underground influence.
Although they will take more work, poured concrete footings with a broader foundation at the base will allow your deck to withstand greater heights and heavier weight.
Start with digging according to code to build a solid footer to last. You may have to burrow over 70 feet to reach below the frost line in cold climates.
Once you finish, you will pour the cement either straight into the hole or through cardboard forms, giving your footings the perfect cylindrical shape. After that, you will attach the deck posts to the top using metal brackets.
Helical Piles
If you would like a method that requires less work for you and less waiting time to reap the benefits, you’re in luck. These permanent 7-foot piles screw into the ground and reach far below the frost line.
Because no cement has to dry, you can immediately move on to the next phase of building your deck.
The process of putting these screw piles into the ground is simple. You contact an expert that will bring a large machine to install them for you.
Helical piles are quickly growing in popularity, and homeowners may soon prefer this source of support.
If you happen to get your hands on the equipment and certification necessary to install these large screws yourself, you can do so by following these steps.
- Connect the adapter to the equipment.
- Use 5 to 20 rpm of advancement rate to install them.
- Use a continuous motion and ample downward pressure.
- Align the helical pile.
- Use high-grade nuts and bolts to make the connection.
Depending on the soil you’re working with, you may have to reposition the pile. Gravel-filled and rocky areas may call for several marked positions in a small section.
In some cases, you may even need to remove the screw from that spot entirely and install it in another area.
Ground Screw Anchored Footings
A less known but quite useful piece of hardware to use as your footing is a ground screw that works similar to the helical pile.
These footings consist of a drill that screws in the ground and a load plate to support the deck. Also, a saddle attaches to your post and is sometimes adjustable.
You will need a handheld impact wrench to install these footings to screw them into the ground. Bases like these are significant for lighter projects that will need to hold low to medium levels of weight.
Each footing can support a minimum of 19,000 pounds per square foot, which is a decent amount of load capacity.
Although, if you plan on putting an acrylic hot tub or pool on your deck, you may need a more sturdy footing.
Ground Spikes
Another alternative to helical piles is ground-anchored spikes. Although they are less effective than helical screws, you can benefit from the reduced cost when building low to the ground decks.
Unfortunately, these spikes typically attach to fence posts. So depending on where you live, they may not go deep enough to penetrate the frost line.
To install these as your deck footings, you could either use a jackhammer or go old school with a sledgehammer.
You must be accurate when placing them in the ground because a significant tilt is terrible for your deck. In addition, the footings can be hard to pull out once you ram them into the ground.
Precast Stackable Cement Footings
Another option for your deck is the convenient precast stackable cement footings. As their name states, they are individual pieces of footing that stack on top of each other to give you similar support to what you would get from poured cement.
First, dig according to code, with the end of your hole reaching below the frost line. Then, starting with the broader base, you’ll place the pieces on top of each other, connecting them with a threaded anchor rod. The process is quick and easy, giving you the benefits of poured cement without waiting.
Deck Blocks
The concept around deck blocks is much like precast stackable cement footings, except these are less reliable under extreme height and weight.
That’s because they fit just below the surface, giving only moderate support. Deck blocks typically work best with low to the ground decks.
You would have to place deck blocks more frequently throughout the ground in many cases. The design of these blocks allows you to stick lumber into notches at the top.
Because of the shallow burial of deck blocks, they may not be up to code in your area. So before you use them, you should consult a professional.
In-Ground Posts
In-ground posts are a great way to cut down on the costs and time associated with traditional footings.
They require pressure-treated lumber rated for ground contact to reduce the likelihood of decay.
One major drawback of using this type of footing is that any damage to the in-ground post will require a troublesome replacement.
The steps to building a buried post are simple.
- Dig a hole below the frost line
- Pour a pad of concrete at least 12″ thick
- Secure the post to the concrete
- Backfill with soil
Try a full-length bell shape for the most effective type of buried post footing. It starts off the same way as the above example, except it flares downward in a cone at a 30-degree angle.
You’ll then insert the post into the concrete mixture no less than 4 inches from the bottom. The result is a sizeable bulking cone that can withstand almost anything.
4. Prepare for Frost
It’s the job of your footings to hold up against lateral load. That’s the swaying or horizontal motion caused by weather conditions and crazy parties. They will also assist your deck in supporting heavy loads and resisting underground changes.
While most footings contain concrete which is the best material for foundations, there are measures that you can take to increase their effectiveness in the long run.
Protecting your deck against the perils of frost is one of the most important precautions to take at the beginning of the deck-building process.
Concrete or steel footings are the best for withstanding the effect cold temperatures will have on your soil.
Since steel helical piles are a process performed by a professional, we’ll go through the steps of making sure your concrete footings will last against cold conditions.
The type of soil you’re building out of will give you different levels of difficulty supporting your deck.
Add the fact that water expands about 9% when it freezes, and you can see how improperly built footings could cause a huge issue, heaving and even tilting your deck.
Heavy clay soils, for example, tend to raise decks because they don’t drain water well. Even if your footings are up to code in-depth, ice lenses can cling onto your bases and raise them from the side.
- You’ll keep your deck safe in the winter if you follow these steps while building your footings.
- Use premixed concrete
- Pour concrete through the cardboard form about a foot from the bottom
- Flare the sides of the footing
- Form a mound with soil around the top
Using these steps will add greater volume to the footing base, giving it more resistance against lifting and distributing more weight.
Also, the mound around the top of the footing will help move water runoff away from the post.
5. Build for Weight
A considerable part of building footings that last ensures that they can withstand the decks’ weight plus more.
It would help if you accounted for only the weight of what you plan to do but also a load of what you have yet to think up.
Pizza ovens, pools, and grills can add a ton of weight to your deck, and if you don’t build your footings to withstand it, you’ll be playing a dangerous game.
The table below shows the relationship between soil bearing capacity and live load. This table should give you an idea of how thick your footings should be at a minimum.
| Soil Bearing Capacity (PSF) | ||||
|---|---|---|---|---|
| 1500 | 2000 | 2500 | 3000+ | |
| Live Load (psf) | Footing Thickness | Footing Thickness | Footing Thickness | Footing Thickness |
| 40 | 6″ – 11″ | 6″ – 9″ | 6″ – 8″ | 6″ – 7″ |
| 50 | 6″ – 12″ | 6″ – 10″ | 6″ – 9″ | 6″ – 8″ |
| 60 | 6″ – 13″ | 6″ – 11″ | 6″ – 10 | 6″ – 9″ |
| 70 | 6″ – 15″ | 6″ – 12″ | 6″ – 11″ | 6″ – 9″ |
There are also situations surrounding the area you live in that may lead you to consider making larger than average concrete footings or switching to a different type of footing like helical piles.
- Areas prone to flooding
- Living in a seismic zone
- Freezing areas
- Weak soils
Conclusion
Now that you know how to plan your next deck project, you can get to work on your deck. Be sure to consider all the variables that influence the weight and wind pressure your deck will have to resist.
Deck erosion usually happens slowly over time, leaving many homeowners stunned when they step outside to find uneven heaving and tilted decks.
You can avoid that situation early by ensuring you have the materials and footing depth to maintain your deck for years to come.
Sources