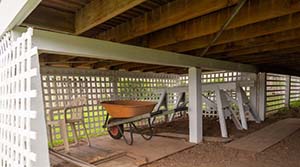
Decks are one of the more enjoyable features of a house but are expensive to maintain. But, there is a way for you to save money while keeping the value of your property. Doing the work yourself is a great way to save and an enjoyable hobby simultaneously.
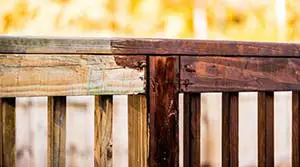
Before finishing, you should clean your deck and sand it using a belt sander, palm sander, and sanding sponge. Start with a coarse grain paper to remove old material, then switch to a fine grain for the final pass. Clean with a broom or leaf blower and stain or paint using your preferred deck product.
Although this can seem like a daunting task, our procedure and tips will help to make it a breeze.
How Often Do I Need to Refinish My Deck?
All wooden decks will need refinishing every few years, depending on wood and finish. The only decks that do not need regular maintenance and refinishing are composite ones.
There are three main types of wood used for decks; softwoods, hardwoods, and pressure treated. The type of wood you have will contribute to its longevity, as will the stain or paint used to treat it.
In general, decks made of softwoods (i.e., pine, cedar, fir) need more regular maintenance. You’ll likely be refinishing them every few years.
Hardwoods will last longer but have a much higher initial cost. To keep their value and prevent greying, you should treat them again every 3-5 years.
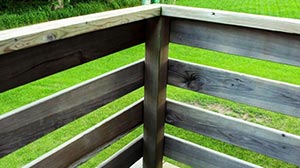
Types of Decks
You need to know the type of deck you have to ensure that you follow the correct procedure for finishing it. There are several main types of decks that we will be discussing throughout this article:
- Stained softwood decks
- Stained hardwood decks
- Painted wood decks
- Composite decks
The frequency of maintenance and the procedure will vary for each of these deck types. Composite decks are made to last decades and will not need any refinishing. However, they may occasionally need repairs.
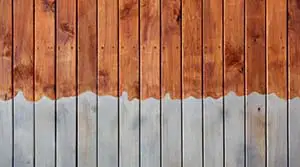
Painted decks will need repainting anytime the paint appears to be chipping or flaking to prevent water intrusion and mold growth.
The preparation step for painted decks is not as involved as the steps for staining, and I’ll cover these steps in more detail below.
Be careful, however, as you may have painted some older decks to look like redwood or another wood shade to hide their age. You can tell by scraping a small area if it lifts off its paint. If not, it’s likely stained.
Stained softwood and hardwood decks require the most frequent maintenance and will focus on this article. They need to be cleaned and sanded before being refinished.
Is It Bad to Sand a Deck?
Some people have heard that sanding a deck is a bad idea. In most cases, this is not correct, and you do want to grind before staining or painting.
The two most likely reasons you have heard this about a composite deck or when you use too fine of sandpaper grit.
As mentioned above, composite decks have a robust mixture of wood fibers and plastic films that can last decades. You would never want to sand these decks, as it would remove the decorative texture and color on the surface.
Using fine-grit sandpaper can reduce the porosity of the wood and prevent the stain from absorbing. Poor stain absorption can lead to discoloration and poor weatherizing ability.
To ensure proper stain absorption and protection, never use a sandpaper grit that’s higher than 80 on any decking.
Will Sanding a Deck Clean It?
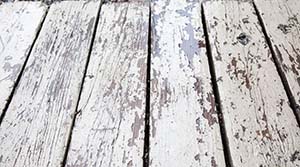
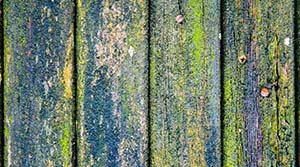
Sanding a deck will usually remove all the unwanted scuffs, scratches, and previous coats of stain on newer decks. However, older decks with mold, mildew, moss, and other fungal growths will need a separate cleaning step.
For best results, you will want to clean the deck separately to remove the debris and make the sanding step easier later.
How Do I Clean My Deck Before Sanding?
You can clean painted decks using any of the following:
- Garden hose
- Mild detergent
- Soft-bristled brush
- Pressure washer
- Paint scraper
- Mold and mildew remover
You will want to use a pressure washer for an older stained deck. Set the pressure washer to a fan setting and test on an inconspicuous spot before doing the whole deck.
Take care not to use too high of pressure, or keep the nozzle too close to the wood surface as you can damage the wood.
You want to remove all dirt and sediments, but you do not need to remove all the old paint. Spray up and down each plank to remove any old finish and surface debris to open up the wood grain to absorb the stain better.
After spraying with the pressure washer, use a paint scraper to clean out the spaces between the planks and anywhere else that gathers debris.
Depending on the condition of your wood, you may consider using a biodegradable mold and mildew remover. Just spray on, allowed to penetrate, and then washed off.
After cleaning, let the deck dry for at least 24 hours before sanding it. Plan your project accordingly. If it does rain, you should again wait 24 hours for it to dry completely.
What is the Best Tool to Sand a Deck?
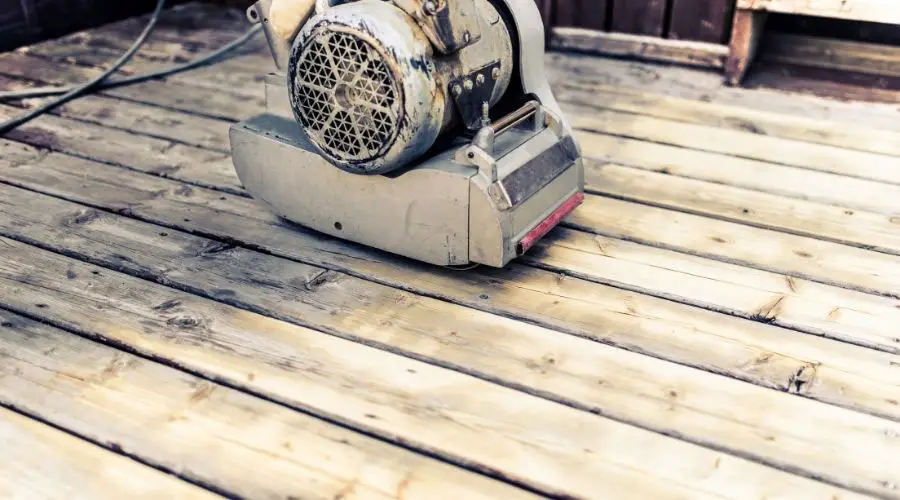
There are several tools you can use to sand a deck. However, the best ones are a belt sander and a palm sander.
Some websites will recommend a stand-up orbital sander as it is easier on your body. However, these are not designed for wood decks and will not provide good results.
Orbital sanders have large pads made for perfectly flat surfaces. Most wooden decks are not perfectly balanced, and the sander will only reach some areas. Furthermore, orbital sanders are large, heavy, and challenging to use.
So, for all stained and treated decks, use a belt sander to ensure you can reach every plank and get even, consistent results.
It may be a little bit harder on your body, but the result will be worth it. If you do not have a belt sander, many shops will rent them out to you, or you can often find cheap ones at pawn shops or flea markets.
You do not need to remove all of the old paint when sanding for painted decks. Instead, use a paint scraper to remove all the flaky or chipped areas. After that, use a sanding sponge to smooth all the edges of the paint.
Depending on the deck’s condition, you may also want to use a palm sander for any rough areas.
Should I Make Repairs Before or After I Sand the Deck?
You always want to make all repairs needed before sanding. The best time to do this is when the deck is drying or is completely dry from the power washing.
There are three main things you want to check for and resolve before sanding:
- Popped up nails
- Broken or bent boards
- Holes/cracks
1. Fixing Popped Up Decking Nails
Nails that have popped up above the surface of the wood deck will ruin your sandpaper, so you should fix them before sanding.
Look around closely and use a hammer or nail punch to set all loose nails. If the peg is still disconnected, replace it with a 3-inch exterior wood screw or deck screw.
2. Fixing Broken or Bent Decking Boards
Weather and time may cause some shrinking and warping of the wood used for your decking. In some cases, you can repair this, but it is usually easiest to replace them.
If you want to try repairing first to save money, you can bend the board back into place.
First, remove the fasteners (nails or screws) holding the board down. Next, start by securely fastening one end of the board with screws to the deck frame.
Then, use a crowbar to help bend the board back straight and have another person screw the rest of the board in place.
3. Fixing Holes & Cracks in the Wood
Holes and cracks often form where the knots are in the wood or by insects. Either way, they are unsightly and can lead to further deterioration.
You want to fix these before sanding to treat them together with the wood.
Use a wood filler such as wood putty or plastic wood. Apply with a scraper or trowel to fill all holes and cracks. Read the instructions and be aware that more significant gaps may need multiple applications.
What Sandpaper Grit Should I Use to Sand My Deck?
Use coarse grit and medium grit paper instead of fine grit paper to sand your deck. Fine grit paper will not absorb the stain.
Sandpaper has numbers according to the grit size (how large to abrasive is); the lower the number, the more coarse the grit, and the more material it will remove.
A 50 grit sandpaper has large and rough sand particles that will remove the old finish and the top layer of wood. Alternatively, something like a 200 grit paper has much smaller particles which are best for finishing.
Don’t use anything higher than an 80 grit for the deck planks. We will do two passes, one with coarse grit and one with a medium-fine grit.
So, if you have an old deck, you may start at a 40 or 50 grit to remove the old finish and UV-damaged wood. Alternatively, you may begin with a 50 or 60 grit if you have a newer deck or one in good condition.
Either way, you will want to do a second pass with 80 grit to remove all scratches. For the railings, you can go slightly finer. Depending on preference, start with a 60 or 80 and move up to an 80 to 100.
Generally, you will use both the belt sander and the palm sander for the decking and the palm sander and sanding sponge for the railings. So, plan and purchase what you need the first time.
What is the Easiest Way to Sand a Deck?
Now that your deck is cleaned and repaired, you are ready to sand. Start with coarse grit paper for easy deck sanding and remove the old varnish or stains. Also, help reduce any deformities or raised wood with the coarse-grit paper.
Work from one side of the desk to the other, moving down one entire plank at a time. Of course, always sand with the wood grain, not perpendicular to it, to ensure you get even and consistent results. Repeat with the medium-fine grit paper.
Once you have sanded all the large areas, switch to the palm sander to get all the difficult-to-reach spots.
Remember that you want to remove all deformities and leave a uniform surface, but we are not trying to make it super smooth. A bit of texture and porosity helps to hold the stain and extend the decking life.
Can You Stain Your Deck Right After Sanding?
After you have sanded, there are still a few more steps you want to take before staining:
1. First, Clean Up the Dust
Ideally, use a leaf blower or air compressor to clean up dust. If you don’t have access to either of those, you can sweep it. But, do not use a stiff-bristled brush, or it could leave scratches.
2. Do a Second Cleaning
Some will also recommend that you clean the deck one last time to help open the wood’s pores again to accept stains and improve results. I usually do not do a second washing step because I have a redwood deck.
However, this can be a good idea if your deck is made from softwoods not only to open the pores but to improve color. Wash with a soft brush and deck cleaner solution.
3. Use a Wood Brightener
We already removed black mildew, and the sanding should have removed UV damage (greying), but your wood may still be dull or dark. It is often caused by a pH imbalance, making the wood too alkaline.
Wood conditioners contain a mild acid that helps restore proper pH, light wood and bring out the grain contrast.
4. Wait 24 Hours for it to Dry Before Staining or Painting
By following these easy instructions and tips, you should have a beautiful deck ready for whatever mother nature throws at it. Now, the next time sanding is needed, you will be prepared and confident to complete the job on your own.
Conclusion
Sanding is one of the best ways to prepare your deck for staining or painting. It provides a clean surface to help your overall deck project result in an excellent finish.
Cleaning and repairing the deck before sanding while using the right tools is essential to have a beautiful patio ready for you to enjoy.
Though it may incur additional costs, hiring a professional is still a wise option that will save you time and provide a satisfying outcome.
Sources