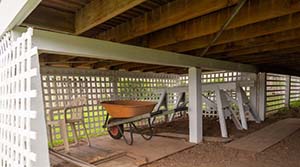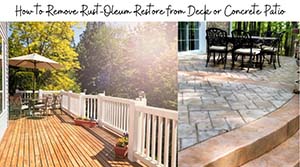
Painting a deck may sound like one of the simplest things, as all one needs is to apply a paint coat on the surface. But this isn’t the case with most of the houses I have inspected.
Most of those who painted their deck or any part of their house without preparing ended up not getting the dramatic results they wanted. So how do you prepare and paint a deck?
Here’s what I discovered upon painting mine:
The fundamental success hack when painting a deck is conducting the perfect surface preparation process. It would be best if you scraped off all loose paint on the deck first. Additionally, the surface must be clean and well dried. Also, you must sand rough surfaces before applying a paint layer.
But why is all this preparation necessary? It sounds lengthy and tedious, which could have you wondering if you must do all this.
Well, everything is imperative, especially during the preparation phase. Read on for an in-depth elaboration on fundamental deck preparation and painting tips.
Can I Just Paint My Deck?
You cannot immediately paint your deck after construction, especially if it is made using pressure-treated lumber. Such lumber has a preservative chemical purged into it to prevent attack by insects and decay.
Thus, when you purchase it, there’s a chance that the wood will not fully be dry. It would be best if you allowed this moisture to dry off before painting your deck.
It is best to allow the deck’s moisture content to go below 15. The wait duration will depend on how long the lumber was at the yard after being pressure treated. Thus, the deck could be ready for painting Immediately after construction or after several days.
Determining the moisture content of the deck is straightforward when you have a moisture meter. You can purchase or rent one from your local hardware. Alternatively, you can use the conventional way of detecting the dryness of lumber.
Sprinkle a few drops of water on the deck. If this water is still on the surface, the deck is not ready for painting. On the other hand, if this water is absorbed, you can prepare the deck for painting.
How Do You Prepare a Deck For Painting?
After determining that the deck’s surface is dry, preparing it for painting is crucial. It governs if the paint applied will stick firmly or flake off after some time. It is nonetheless a lengthy process but one that is easy to follow.
First, assemble the cleaning agents and the tools that are necessary for this process. You will require these items:
- A cleaning agent
- A garden hose dispenser
- Plenty of water
- A wire brush
- Sandpaper
After assembling these tools, follow these key steps:
Step 1: Wash The Deck’s Surface
You must wash the deck even if it is newly constructed. There are several deck cleaning surfaces that you can use. The washing process is also simple. Spray the surface with the cleaning products using a garden hose dispenser, then scrap it with a brush. Next, rinse it with clean water.
For this step, consider the following:
Use An All-purpose Deck Cleaner
Any general-purpose cleaner will help clean the deck’s surface. It would be best if you chose a cleaner renowned for cleaning grime and dirt.
If you intend to apply a stain instead of paint, check the stain’s label for special instructions on cleaner choice. Some manufacturers will recommend using a particular cleaner.
Use Brighteners
When cleaning a discolored deck surface, use a cleaner with brightening properties. A brightener is handy in eliminating any stain that the layer of paint or discoloration may not fully cover.
If your cleaning agent lacks a brightener, consider adding one. It will breach the wood to create a light surface that will appear attractive after painting.
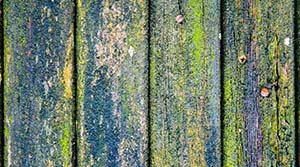
Use Cleaners with Mildew & Mold Cleaning Properties
If the deck has not been painted for a long time or the old paint coat flaked off, it may have mold or mildew. You need to remove this coat using a mildewcide-based cleaner such as RUST-OLEUM 60101 Mildewcide Concentrate.
Do Not Use a Power Washer
You might want to use the power washer to get the job done quickly. It is effective in blasting off dirt and debris. Nonetheless, avoid using it. Since the power washer uses a strong jet of water, it will most probably dig out wood parts from the deck’s surface.
Therefore, instead of using the power washer, scrub the surface with a brush after applying the cleaning agent. A garden hose will be perfect in rinsing the cleaned surface, provided you set it on the jet nozzle mode.
Once you’ve rinsed, allow the surface to dry.
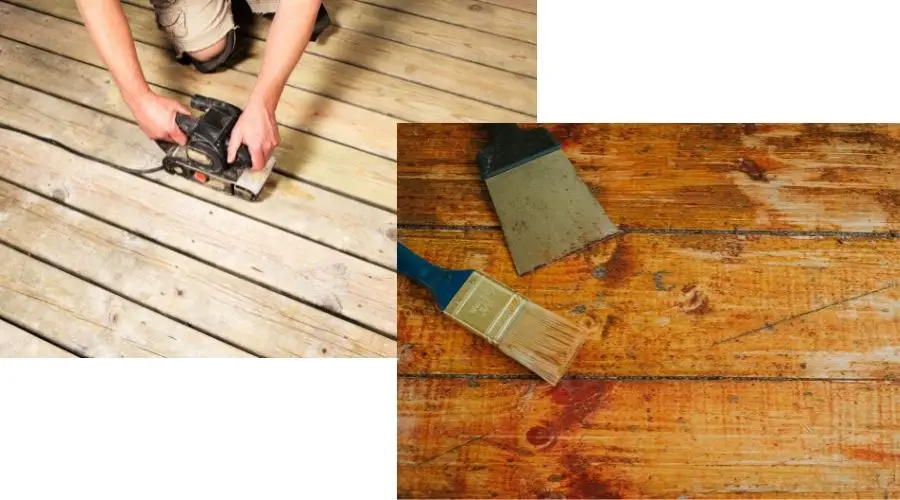
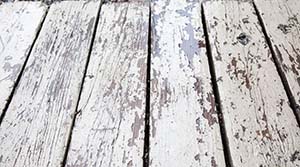
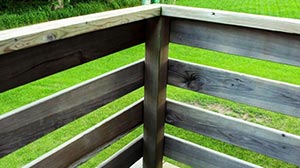
Step 2: Scrape & Sand the Surface
It is imperative to remove all the loose paint on the deck’s surface if formerly painted. Also, scrapping is essential in preparing a new surface for a paint coat. Additionally, if the patio is rough, it is vital to smooth it. Paint will stick on smooth surfaces better than on rough ones.
So how do you scrape and sand the deck? Here are the key steps:
Scrape With a Wire Brush
A wire brush is essential in dislodging the loose paint from the deck’s surface. Make sure all the stain is removed by doing light sweeping strokes continuously. However, some color will still be on there after scrapping with a wire brush. You will remove it in the subsequent step.
Start with a wire brush: Use light sweeping strokes over the painted decking to dislodge loose paint. A wire brush does quick work of getting rid of the loosest paint chips, although it likely won’t get all of them.
Use a Paint Scraper
A paint scraper is an ideal tool for dislodging the paint that the wire brush cannot remove. There are two types of paint scrapers.
First, there’s a flat scraper that resembles a putty knife. It is also easy to use. You need to align its blade at a low angle on the deck’s surface and scrap through light pushes.
The edge in this position will scrap the tiny bits of loose paint. Remember to push the blade lightly to avoid gouging bits of wood from the deck.
The curved scraper is also easy to use. It features an arc at the end of the blade used to scrape paint from the surface. Nonetheless, instead of pushing like in the flat scraper, you will pull the curved scraper to remove the paint. Also, when using this blade, remember to be gentle.
Sand the Surface
Once you have scraped the tiny paint flakes, some paint will still be attached to the deck. Nonetheless, this should not worry you. The color that is not removed even after scraping will not prevent the attachment of the new paint coat.
Nonetheless, it would help if you made the edges of this paint ideal smooth with the parts with no paint. The essence of sanding the surface is to realize this evenness. For fast results, use a power sander. However, you can still use a sanding sponge, and it will be equally effective.
Fill the Gaps
Ensure that you have countersunk all the nails that are popping on the deck before sanding. Also, use putty to fill the cracks that are on the deck.
You can do this using your hand using your fingers. Using sandpaper, scrape the putty that is above the surface to create an even platform.
You might consider replacing the boards that have so many holes instead of filling them with putty.
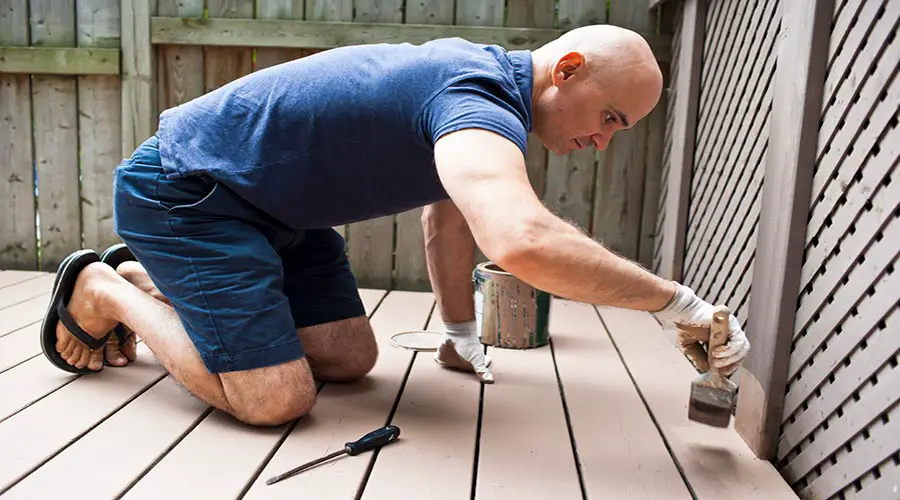
Step 3: Paint the Deck
After you have prepared the surface, the next step should be painting. Give your deck the flawless finish using the paint of your choice.
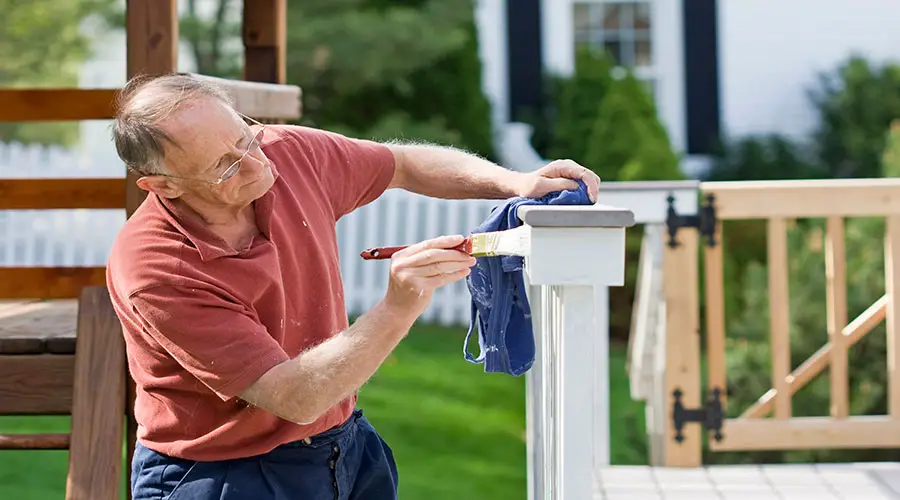
However, before painting, remember to stick painter’s tape to the parts adjacent to the deck. It will prevent the paint from spreading to unintended areas. After painting, allow the deck to dry overnight.
You should paint all the parts of the deck, including even on the underside. Also, remember to paint the sides of the deck. It is essential, especially in areas where there is plenty of moisture or heavy rains.
Moisture penetrates the deck via the sides resulting in reducing the deck’s longevity. Thus, pay attention to the sides.
The painting should not be a difficult procedure once you’ve prepared everything appropriately. Nonetheless, it would be best if you used the right tools for a good job. Here are some of the tools that will be useful in this step:
A Roller
A roller will enable you to have a seamless painting experience. It is fast and also will give an excellent spread. Also, with a roller, you can paint while standing up. All you need is to attach it to a pole.
The roller thickness will depend on the roughness of the deck’s surface. If the deck is too rough, use a roller that is ¾ inches thick.
If it is medium rough, a roller of 1/8 inches wide should perfectly do the job. Lastly, if your deck’s surface is smooth, a foam roller will be effective.
Stain Pads
You might opt to stain the deck rather than painting it. If you settle for this choice, stain pads will be beneficial. They have an absorbent material that holds the stain. You can also attach them to an extension pole. Thus, you can also stain the deck while standing.
Brushes
While the roller does a perfect painting job, you cannot entirely avoid using a brush. There are some parts where the roller cannot fit, such as in between joints. In such sections, use a brush.
Also, after applying the paint using a roller, it is imperative to feather it using a paintbrush. Do this while the paint is still wet. You will achieve a refined finish as the brush will remove the roller marks from the deck’s surface.
Similarly, after the paint has dried overnight, use a brush to even the patchy and uneven areas. It will smoothen the surface and ensure that the paint is properly on the deck.
After several days, your deck should be thoroughly dried and ready for use.
What Kind Of Paint Do You Use On a Deck?
Many people often fail in the paint selection phase as they are not too keen on the type of paint they choose.
You must buy the paint reserved for painting the deck floor or choose the ideal color for painting horizontal surfaces.
Most exterior paints are best fit for painting vertical surfaces such as the side of a deck. Nonetheless, unlike the sides where water only runs off, horizontal parts of the deck require special attention. Small water puddles will likely settle on the flat surface.
Hence, it is a cardinal imperative to choose floor or deck paint specifically. If you cannot find precisely such color, ensure that the paint you buy is designated for painting on horizontal surfaces.
What is the Best Way to Paint a Deck?
The best paint to use for your deck depends on the desired outcome. Those who are focused on aesthetics usually choose to stain. If you wish to create a thick and more durable coat, settle for painting.
The best time to paint is when there is no direct sunlight on the deck. You do not want the deck to dry so quickly in direct sunlight, as it will give the deck a lousy appearance. Hence, morning or afternoon hours are the best for painting a deck.
So given the staining and painting options, which one do you think will serve you best? Let’s take a look at more profound details about each of them.
1. Staining
You must only apply staining to the bare parts of the wood deck. The stain will impart some faint color to the deck’s surface. Nonetheless, the wood grain will still be visible. Therefore, giving your patio an antique look is an excellent idea, primarily when operating on a low budget.
Stain has various shades. You will find some stains that will give your deck little color. Others will be opaque or slightly transparent. It all depends on the pigments that the paint has. Deck stains also come with a sealer to cushion the lumber from its elements.
Thus, to decide whether to settle for paint or stain, you must know the key differences.
2. Painting
A paint coat is a perfect cover for the imperfections that could be on your deck’s surfaces. The paint coat will conceal the wood grains completely.
Hence, if you have replaced some deck parts, the wood grain color is probably different. The painting will cover this difference and give your deck an innovative uniform appeal.
Which to Choose
Painting or staining your deck does not matter, as this is by pure preference. However, it is best to know that if your deck has never been painted or stained before, either one would suffice. On the other hand, if your deck was previously painted, then it may be best to repaint it.
You must be keen when choosing between a stain and paint if the deck is in a humid area. While painting similarly covers the entire surface as a stain, it does not penetrate the lumber. On the other hand, a dye is absorbed and thus does not form a thick exterior coating.
If the deck is in a moist area prone to mold or mildew attack, use a stain. If you paint a deck in such an area, the paint will keep flaking off. Consequently, it will leave the wood unprotected from mold and mildew. A stain and a sealer will absorb into the wood gain giving it complete protection.
What Primer Do I Use for Deck Painting?
Application of a primer when painting a formerly painted or unpainted deck is a good idea. A primer helps to prepare the surfaces for efficient attachment of the paint coat. Here are some of the critical things that you must consider when choosing a primer:
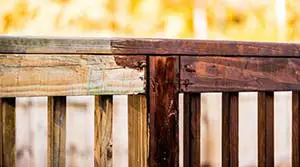
1. The Deck Paint That Was Formerly Applied
The rule of thumb is to identify the paint type applied before on the deck. You need to check whether it was an oil-based paint or water-based paint. The color that you use on the deck must match the kind that you previously applied.
Thus, if you had done an oil-based paint before, this should be the kind to apply in the subsequent painting session. Nonetheless, you can still go over oil-based paint with a water-based variety. For this, you must use a primer suited for converting an oil-based paint to a water-based type.
2. Paint & Primer In One
You’ll find some paints are made together with primers in the same package. Hence, they will both prime the deck and add the color layer that you intend to achieve.
For such combinations, you don’t require a separate primer. The primer in the paint is sufficient for an ideal preparation of the surface.
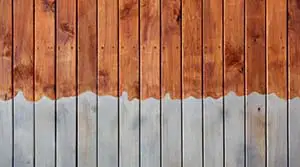
Can I Fill the Gaps On the Deck With Paint?
If your deck has been exposed for some time, leaving splintered wood between the boards, you can fill the gaps with paint. But, the typical paint will not effectively solve this problem. Several types of exterior colors are suited for such tasks.
For example, you can settle for the thick paints that fill up deck cracks measuring up to ¼ inches. Such color is significant in providing the perfect cover for nail holes and gouges on the deck. Thus, fill holes and gaps that are making the deck unattractive using thick paints.
Nevertheless, you don’t have to undergo the hassle of finding thick paint if your deck is in good shape.
How Much Paint Do I Need for Deck Painting?
When buying paint, you need to be cautious not to have less than what is required. Thus, you’d rather have more than less.
If it’s more, you can use the leftover to do touches after applying the first coat. Nonetheless, having much more than necessary is wasteful. It is an unnecessary cost that you undoubtedly would want to avoid.
Let’s look at some of the critical hacks of ensuring that you have what is enough.
- First, you need to determine the square foot of the deck’s surface that you want to paint. You can find this by multiplying the length with the breadth of your deck. For example, say that you have a deck measuring 15 feet by 20 feet. The square feet of the deck is 15 x 20 = 300.
- If your deck has steps, you might also consider painting them. You will find its square foot in the same fashion. Add the square foot of all parts of the deck.
- Multiply the total square feet by a multiple of the number of paint coats you would want to apply. For example, say you want to apply two coats. In this case, you will need to multiply the total square foot by two. Hence 300 x 2 = 600 square feet.
- Next, check the designated average coverage of the paint. Divide the area you find in step two with the paint’s average estimated coverage.
For most colors, the estimated coverage is 350 square feet. Hence, 600 / 350 is approximately 1.714. You will thus need 1.714 gallons of paint. Since paint is commonly retailed in gallons, two gallons would be sufficient for painting this deck. - If your paint choice is not a paint and primer in one, you’ll need to include a primer. Calculate the volume of primer to use using the above-explained formula. Don’t skip using a primer, as it is key to the attachment of the paint to the surface.
Final Thoughts
Giving your deck a fresh look is a brilliant idea. However, you must make sure that it comes to fruition by preparing the surface appropriately. Do not just take a roller and paint and start painting. Instead, prepare the surface without haste.
Remember that you might not have to repaint the deck in the next two years. Also, you are not just painting the deck for the sake of a good appearance. You want to prepare the surface to withstand weather conditions such as direct heat and moisture.
Having the right tools for preparing and painting is also a fundamental preparation prerequisite. Get everything ready first, then paint. Take time to prepare the deck’s surface, choose the right paint and apply it appropriately.
Do a job that you will be proud of for the next few years.