Understanding how to lay patio pavers on dirt is not too technical but does require some work and patience to do the job right.
Laying patio pavers on dirt can be done by a professional contractor or as a DIY project. You need to take a few steps to prepare and level the ground to provide a solid base to lay out the pavers to ensure a level patio that will provide enjoyment for many years.
You can select either concrete, brick, stone, or travertine patio paver for your task. However, without the proper base, all your hard work could go to waste.
Here, we explore some tips on how you can lay patio pavers on dirt.
How to Prepare the Ground for Pavers
Below are 8 easy steps to preparing the ground for pavers:
1. Remove Any Grass
Before you lay patio pavers, ensure there is no foliage or grass in the area. While removing the foliage or grass, use a spade to dig deep and remove everything, including the roots.
Leave no grass behind since it could lead to new grass growing up between pavers in the future. You can transplant the grass that you removed to other areas of your yard.
2. Use Fill Dirt To Level The Ground
There is a need to put all the patio pavers on level ground if you want them to line up perfectly. You can easily level your land using clean fill dirt. Clean dirt is any dirt that doesn’t have organic matter, large debris, or toxins.
Fill dirt is primarily for construction purposes, especially for land grading or building foundations projects. If you were to use topsoil for land leveling or foundations, the project wouldn’t be successful since topsoil has organic matter that breaks with time.
However, there is no guarantee that the dirt you get doesn’t have organic matter meaning that you aren’t sure of its ability to create a permanent level grade in your area.
It would be best if you, therefore, got your dirt from a certified fill dirt contractor. This way, you’ll be sure of getting dirt that is screened and found free of large debris, toxins, and organic matter.
Taking your time to establish a level and lasting base will ensure that your patio pavers stand the test of time. It’ll also offer them a fantastic and appealing look.
3. Mark The Area
The next step is to mark the parameter of the area you’re going to grade using stakes. Once stakes are in order, decide the height that you’ll consider “level.”
It could be easier to build up the ground than digging and worrying about removing dirt, especially since you will add dirt anyway. Locate a location within the parameters that you’re going to develop the rest of the area to match. Mark the location with a stake.
After deciding on the height you’ll build up to, you can use fill dirt to bring all areas within the parameter level to that height.
It’s very simple to place the fill dirt on your area.
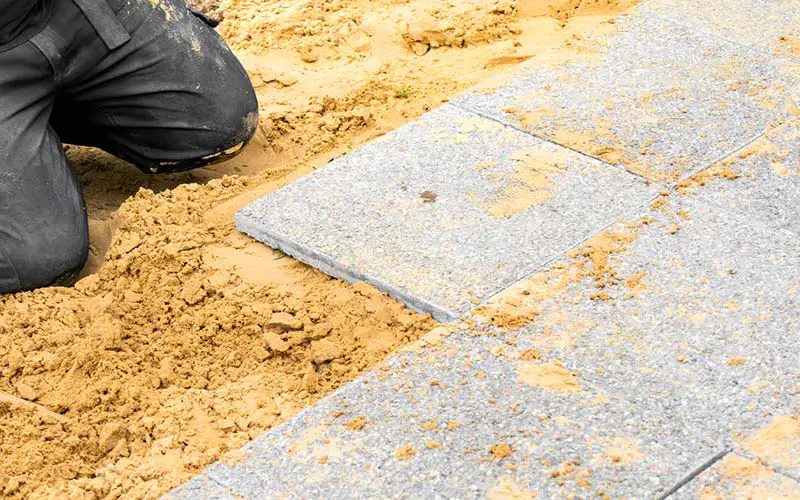
4. Compact The Fill Dirt
After you level the whole area where you’re going to place the patio, you should lay another thin layer of fill dirt. Use a tool such as a hand tamper to pound over the exposed soil to level and compact the ground.
The more force you apply in compacting the soil, the better. Your patio pavers will be more stable if you compact more fill dirt.
5. Place Geotextile Fabric Down
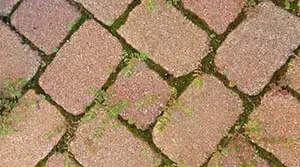
It would help improve drainage, deter weeds from growing, and firm up the base by placing pieces of geotextile fabric over the fill dirt. Secure the fabric edges with spikes so that they don’t show.
Never skip this step, as it’s the perfect way of preventing weeds and ensuring that your patio pavers are long-lasting.
6. Add Edge Restraints
Place either metal or wood restraints against the inner walls of your compacted fill dirt. If possible, fasten the restraints with 9-inch nail spikes via the edging holes.
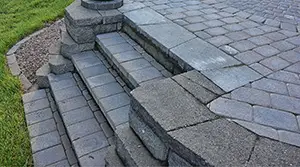
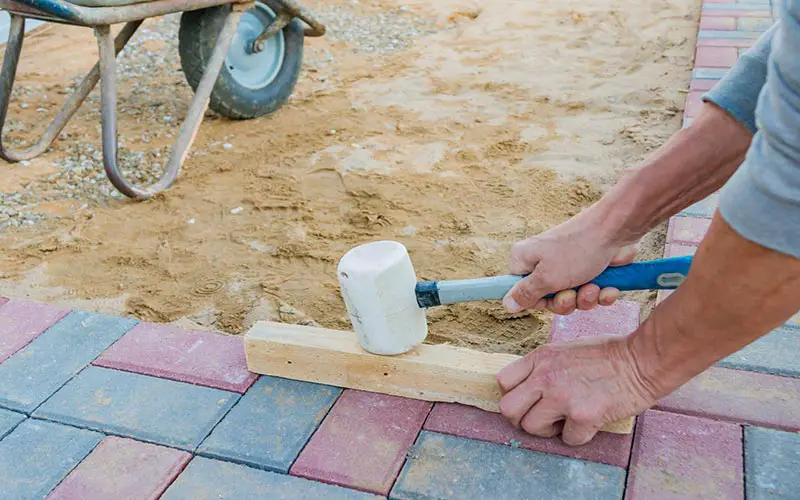
7. Lay Down Your Patio Pavers
Place your patio pavers in the pattern you desire. The most important thing is ensuring that patio pavers remain flush against each other. Begin by laying the pavers at one corner or end and work your way across.
After completing a small section, you can put a wooden board over it and hit it with a hammer gently to embed the bricks with dirt and keep them level with each other. Continue until you finish laying the patio pavers.
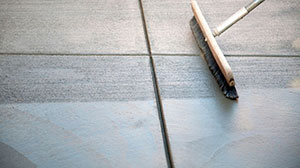
8. Add Stone Dust
The final step involves pouring stone dust on the patio pavers and sweeping it between the small cracks. You can then moisten your bricks and pour the stone dust again. Sweep the stone duct into the cracks again.
The dust helps in filling the tiny spaces left between the patio pavers, thus acting as a weed barrier.
What is the Best Base for Patio Pavers?
A patio paver base consists of different types of materials. Let’s go through each of them below:
Brick
Bricks are among the most popular paver materials to use. Here, you can employ creative chops by applying them in intricate patterns.
Brick pavers are available in different finishes, colors, sizes, and shapes. They can also look new or old depending on your preference.
However, bricks are smaller than other available options, thus taking longer to install. They also come with a higher installation cost. You can manage the job at $3-$5 per square foot. You might also have to rent a brick saw at the cost of $60-$95 per day.
A professionally installed brick patio costs between $12 to $18 per square foot.
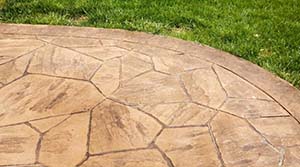
Concrete
You can finish concrete in various colors and imaginative ways, including acid, washed, stamped, scored, and brushed. It has become a popular option thanks to its relatively inexpensive installations and long lifespan.
For colder climates, add $1-$2 per square foot of concrete additive. You can use stamped concrete to simulate cobbles, brick, flagstone, and other decorative patterns.
Installation of concrete pavers can be between $6 to $12 and may vary depending on color and finish.
Rubber Tiles
These pavers are developed from recycled tires. They are designed for any surface with a lightweight that you can apply on decks. Even though they resemble concrete tiles, they have finishes that look like terracotta and brick.
However, rubber tiles are still new in the industry. They are strictly DIY materials and are perfect for covering cracked, worn, and old surfaces. They can cost $3 to $5 per square foot.
Slate, Marble, and Flagstone
Almost any type of stone can function as an effective paver. However, most are slate, limestone, granite, or sandstone. The materials you choose will be cost-effective if you get them from a local quarry.
Stone pavers are mainly cut into modular shapes; 18×18, 12×12, and 6×6 inches. Uncut pavers come in various sizes and have irregular and rough edges.
It would be best if you approached a professional to install these stones for you since they offer quality work. The installation might cost $12 to $28 per square foot based on the stone you select.
Pebble Surfaces & Decomposed Granite
Decomposed granite involves tiny pieces of granite that come in sizes from ¼-inch to the size of sand. They are affordable, and some people prefer the way rain disappears and the crunchy texture they provide underfoot.
However, you’ll have to replace the granite from time to time since the surface typically erodes. The cost can be $1 per square foot at least every 3-years.
You can also add stabilizers to solidify the surface. The cost of installation is about $2 per square foot with stabilizers and $1.5 without stabilizers.
Do You Need Gravel Under Patio Pavers?
Many professionals recommend that you use gravel bases due to the firm support they offer to pavers. They absorb the ground tension and allows moisture to get in and drain with ease. This prevents the patio pavers from sinking.
Here, you can use landscaping gravel. After adding gravel, remember to place edging constraints around the perimeter. You can also cover your gravel with sand then place pavers on top.
8 Factors to Consider While Selecting Patio Pavers
Consider the below factors while selecting the patio paver of choice:
Application
The type of project you want to do determines the type of patio paver you use. For instance, pavers on the driveway happen to be thicker compared to those on the garden path. However, certain pavers are cross-functional.
Here, you can also consider the texture of your pavers. Some pavers have more texture than others meaning that they offer both slip resistance and visual appeal.
Budget
Budget is a major consideration while selecting the type of paver to use. Cost is likely to disqualify certain material from your list. For instance, manufactured concrete pavers are cheaper compared to natural stone pavers. It would be best if you went for the pavers that you can afford.
Apart from the cost of buying the pavers, there is also the cost associated with installation. If you install the pavers yourself, the cost will be lower compared to if a professional was to help you out. There are pavers that only professionals can install and some that you can do yourself.
Style & Laying Pattern
Pavers are available in different sizes, surface textures, shapes, and styles. Each of the shapes or styles is likely to create a different look. One key consideration is whether you intend them to be stand-alone statements or a seamless extension of your interior living spaces.
The sizes and shapes of pavers also determine the laying pattern. You might prefer a circular effect, random patterning, straight lines. Or brick pattern. We recommend that you keep your landscape cohesive by applying the same pattern all over the paver areas.
You can consider mixing sizes, styles, and shapes the way you want to express your personality.
Color
Pavers are available in different colors, including charcoal, warm tan, brick red, fog gray, light cream, or multicolored. While dark colors make spaces look smaller and light colors make spaces look larger, you should complement the colors of your house and integrate the pavers into the landscape.
Materials
As we have seen above, there are different types of materials that you can select from, including stone, concrete, and rubber tiles. The type of material you select determines the buying price, maintenance, and installation.
For instance, concrete pavers have a lower cost, design versatility, low maintenance, easy installation, and no spalling. They also come with more durability and a realistic appearance. However, the choice narrows down to two critical things: appearance and budget.
Maintenance and Durability
The good news here is that most pavers are low maintenance. However, stone pavers have the lowest maintenance from the available options.
The regular maintenance of paver is known to boost their durability. What you should know is that some pavers are more durable than others. Always select pavers with an easy-cleaning surface that’s resistant to etching and staining from spills, de-icers, and chemicals.
Eco-friendliness
Eco-friendliness is a crucial consideration, especially for eco-conscious homeowners. Natural stone is a better option when it comes to the carbon footprint. The stone is quarried and, when depleted, can be repurposed and reclaimed. The only ecological cost here is the transportation and the quarrying process.
Eco-conscious people should avoid concrete pavers since they go through unsustainable environmental processes.
Warranty
It’s important to have peace of mind. Here, it would be best if you went for pavers that guarantee you results. Only buy natural stones from reputable queries and other pavers from reputable companies. You can go for a company that offers a warranty since it guarantees performance.
Benefits of Laying Patio Pavers on Dirt
Below are some benefits of laying patio pavers on dirt:
Added Curb Appeal
In most cases, a home has a higher value if it has a better-looking backyard. If you want to improve the curb appeal of your property, you should lay patio pavers on dirt. However, don’t just limit the patio paver to your backyard.
Long-Lasting & Low Maintenance
Patio pavers can last for up to 50 years with little or no maintenance. Of all the available patio paver materials, natural stones are the most durable. Unlike decks, you don’t need to stain or sand patio pavers every year.
Customization Options
You have limitless possibilities as far as designing patio pavers is concerned. For instance, you can select from modern, circular, herringbone, or jigsaw puzzles for your floor layout. You can also design a rectangular, multi-shaped, square, or oval patio.
Hiring a Professional vs. DIY
Installing patio pavers is a straightforward task. In most cases, you can complete the job by yourself. However, it’s labor-intensive and time-consuming.
A lot of time is spent on carrying piles of bricks and stones. Are you still wondering how to install a patio paver in your backyard? You can always begin by looking at the area you want to lay the patio.
If a major leveling has to be done to fix a dip or a slope, you require heavy equipment. Leveling the ground ensures that your ground lasts longer.
If, for instance, a 350 square foot patio paver takes a professional 35-40 hours to complete, expect to complete it on your own within 40-50 hours.
However, large patio paver projects requiring custom design and heavy equipment should be left to professionals. They understand better the best material type for your soil and know how to prepare any area for a smooth foundation.
You can also contact a professional if you don’t have the required tools and equipment. Most professionals have already invested in tools for this purpose.
A professional will also do quality work compared to if you were to do it yourself.
Saving Money on Patio Pavers
There are several approaches to save money on patio pavers:
- Employ creativity while installing a functional patio if your area has landscaping and grading challenges. To keep the costs low, remove landscaping and eliminate extra grading.
- To save the labor costs, complete landscape removal on your own beforehand.
- Research on the available stone paver to identify the best option for your budget and needs.
- Access several price quotations from different contractors and pavers. Select the one that meets your budget.
- Buy pavers during the off-season when you can get a discount.
- Mix different materials such as brick, concrete, and stone to come up with a fusion of designs at a low cost.
- Rather than purchasing decorative tiles, paint the pavers yourself.
Conclusion
Laying patio paver on dirt is quite a straightforward process. You can do the task yourself or contact a professional to help you out. However, if you decide to do it yourself, you should understand the technical and creative aspects of installing them.
There are also different materials to select from, including brick, stone, and concrete. Even before you choose the patio pavers to use, consider the factors that we have highlighted above. Always purpose to get quality patio pavers at a reduced cost.
We hope you succeed in laying patio pavers on dirt.
Sources:
How to Lay Patio Pavers on Dirt